Chem’s Comprehensive MoF guide (PvE, Mod4)
CONTENTS
1- Preface
2- Acknowledgements
3- Philosophy
4- What a control wizard (actually) is
5- What Race do I choose?
6- Smolder
7- Your stats and you
8- Ability Scores
9- Heroic Feats
10- Paragon Feats
11- Boons
12- A note about boons and feats
13- Pets
14- At Wills
15- Encounters
16- Dailies
17- Features
18- Armor
19- Weapons
20- Artifacts
21- Jewelry and enchantments
22- Armor Enchantments
23- Weapon Enchantments
24- The Basic Setup
25- How we do damage
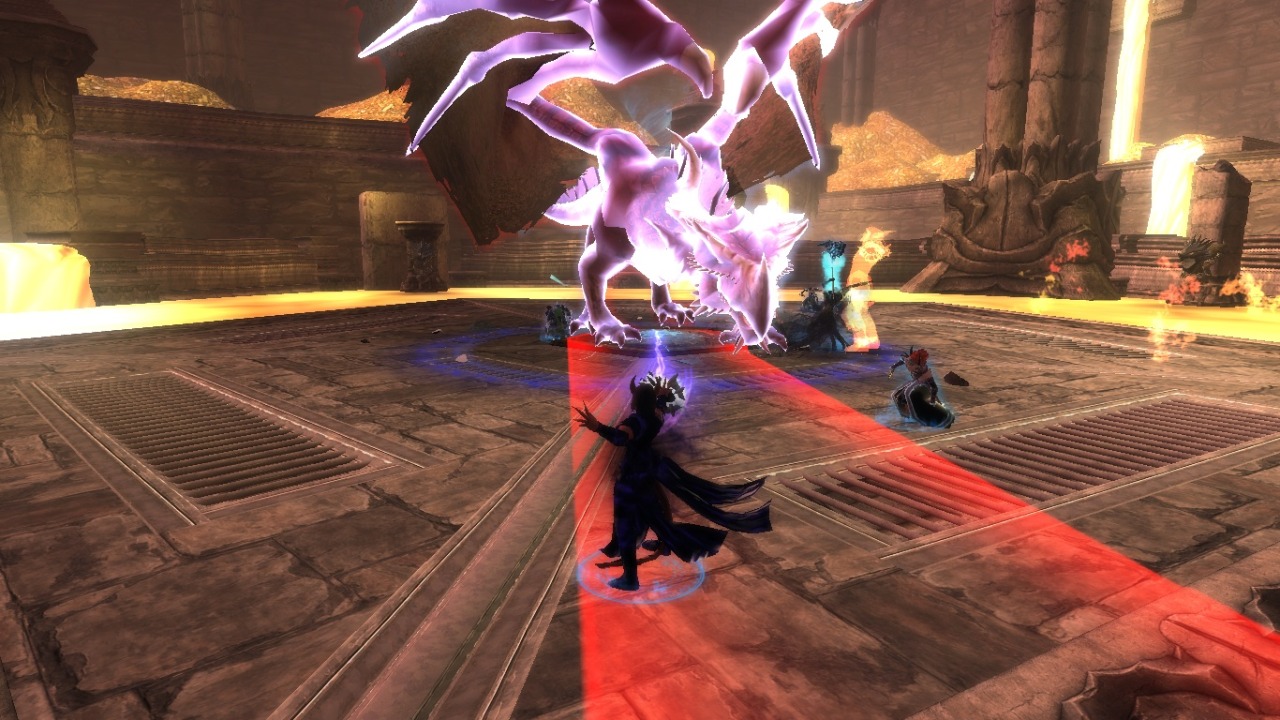
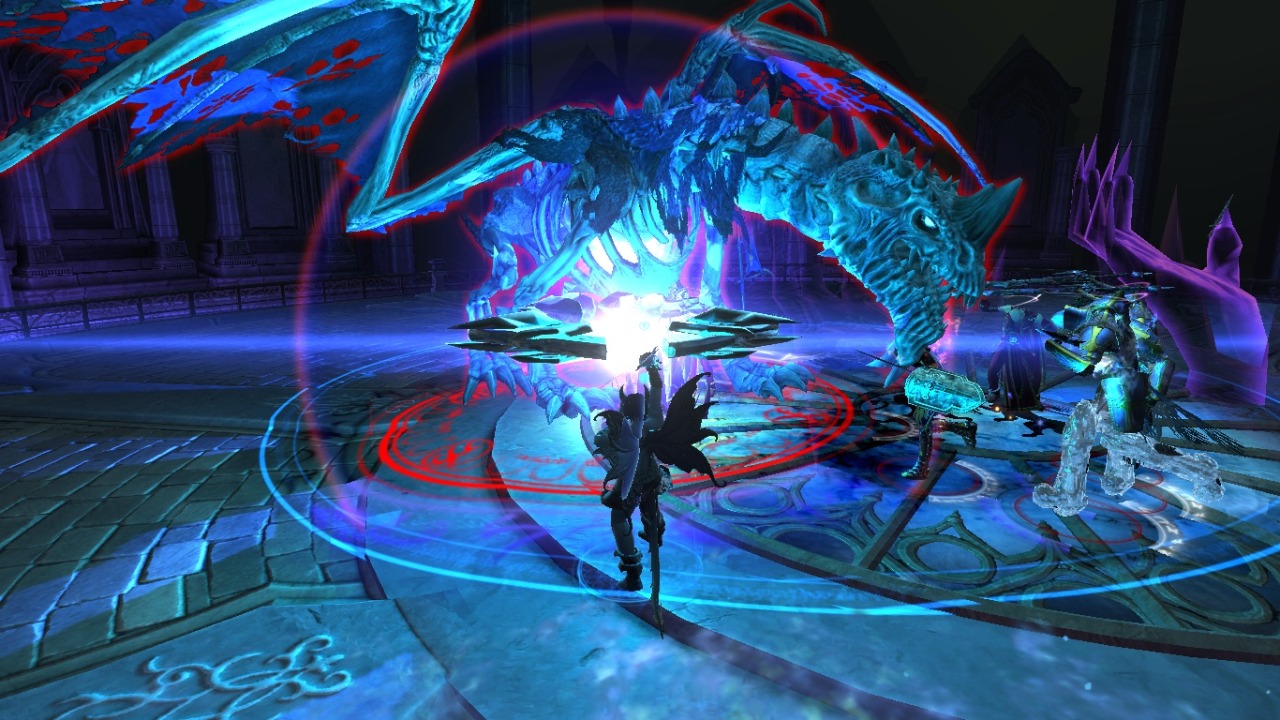
26- Playstyle
27- Fighting Dragons
28- Special Dangers
29- Individual Dungeons
30- Wrapup
1 – Preface
This is a guide for how to build, play, and be excellent as a Master of Flame CW in Neverwinter. It is a PvE guide, and certainly not a PvP guide. If you want a PvP guide, you’ll have to entice one of the high-end PvP CWs to write it for you.
This thread is not, will not, and cannot be a debate of MoF vs. SS CWs. I am very tired of this argument. Normally it goes “Spellstorm wins paingiver, therefore MOAR POWER MOAR GOOD.” If you want to discuss this, start another thread, but not here.
That said, Spellstorms and Master of Flame wizards are both excellent, but they are different. Their key class mechanics and features are very different, they do damage differently, and to play well each has a different playstyle. I believe that if you tried both paths you would feel good in one and bad in the other. Personally, I have a spellstorm CW, but when I play her, I feel i am doing absolutely everything wrong.
Personally, my qualitative observation is that a Spellstorm and Master of Flame are synergistic siblings. The Spellstorm makes up for the pure burst a Master of Flame lacks, where the MoF creates the DoT and debuff that Spellstorms lack. This is a situation where one of each is better than two of both, for sure.
If you want to discuss how you do, can, or play your SS CW, there are some great guides up here. I really respect the work that Stox and Grimah and others have done. Don’t get lost in the comments. These guys have done the research, where most people on these forums simply haven’t. We must distinguish between what we perceive and what actually is – and these things can be quite different.
My advice – if the person offering their opinion is either anecdotal, or pure theorycrafting, or only a few runs, don’t trust them too much. We must measure the reality behind our eyes and understand the mechanics.
Fortunately, i’ve done most of that leg work for you. Before I was a great CW, I was a lawyer, and before that, a scientist, and it is my job to understand data qualitatively. While i don’t pretend to be perfect or certain, I have done my best. I will (of course) update the guide if i discover something new, if something has changed, or if through our discussion something constructive comes from one of you.
That said, if you want to flame me or troll me, you will meet the same fate as Sean Bean in… well… every movie Sean Bean is in… (I feel bad for the guy).
2 – Acknowledgements:
I have spent thousands of hours in Neverwinter and met many amazing people. Many of these people have helped me and contributed to me, which has lead to making of this guide. I am absolutely, positively certain i will forget many many names here. It is not personal, there are just too many:
Before anything, thank you Blizzard for crashing the D3 auction house, and further removing it. I don’t see the point of farming if i can’t get rich as well as powerful.
My OG crew from Slayer’s Vigilance, Dar, Constantine, Marek, Tasha, Six (if you see Sixsickthis in PvP – run), and the wonderful, amazing Kat Ward. You were my first crew back in the day, and we all geared up and became good together.
The wonderful people from the PI in Nikostratos, Kristine, Dany, Skype, Kronin, and many others, you ran with me and taught me CN, i learned to throw by watching you guys play. I hope you come back to the game and avoid the monsoons and floods in your country.
The OG Crew back in Legion, for staying with me patiently when I was learning CN as well. I remember wiping at draco for HOURS. Eibs, Cack, Mort (you suck, Mort), Zak, Attens, Mang, and of course, Vivian. When i formed Crescendo, you guys were our sister guild and we enjoyed many, many runs together.
To the NW Legit community – you guys are cool, relaxed, kind, and chatty, which is nice, and it’s great to know other excellent players who think this game should be about smashing skulls and not jumping through walls.
To the Cloaks – you guys are positive and relaxed (and a great beginner guild for anyone who is new), and make me laugh when I get too intense about this game.
Nano and Carla for being excellent friends and students. If you are curious about the lightning build, Carla is the person to ask about that, and if you see Nanners OG in PvP – i recommend you run.
Most importantly, to our old guild in Mod 1/Mod 2 Crescendo’s Tyranny. Anyone who has ever worn our name around their heads, you have carried it with amazing skill, honor, and integrity. I remember that roster and we had 25 excellent, amazing CWs, most of who could short man draco back when that was an accomplishment, and 10 amazing players of all other classes. I still say that if we took the 20th best CW or two, 10th best cleric, and 10th best GWF in that Mod, we would clear CN in 30 minutes, no wipes, seamless.
Not only that, you guys were a second family to me when i really needed it. You can’t imagine what that meant to me as a person.
An extra special thanks to my officers, Joo and Theo.
Theo – i hope your hotel is going well, business is booming, and your wedding was amazing.
Joo – I hope you are in good health and your father did not suffer much.
If you feel left out, don’t fault my appreciation, but rather my memory and my intolerance for typing long lists.
3- Philosophy
First and foremost Neverwinter is a team game. We must never forget that we are clearing any instance worth clearing in a team. (note – if you are OP enough to solo something, you probably should be running something harder. If you can solo eLOL, i want to see the video.) The measure of how good a player is has nothing to do with the charts at the end of dungeon. There are many things that obscure the charts, specifically paingiver and field medic. Some mechanics are caused by one player and yet credit is given to another. Smolder, Tyrannical Threat, and the incoming healing bonus from Astral Shield come to mind, but i’m sure there are others.
Secondly, these do not accounts for things like buff, debuff, control, aggro management, coordination, and teamwork, all of which contribute to success. For example, a DC may do almost no damage, and maybe almost no healing, but nimbus of light, divine glow, high prophet, a perfect terror, blessing of battle, hallowed ground, and a big blue circle to protect the team, and I bet everyone loves that DC! However, that will not show up at the end of the run.
CW can also buff and debuff the group, in fact because of high target limits and four encounters, CWs are very effective debuffers. Played correctly a CW can control enough for the team to win. There was never a reason to stack CW, but rather it was to account for the fact that most players are bad and can struggle with things such as equipping enough lifesteal, getting out of red circles, and targeting the boss with their spells. However, with the right bar, skill, feats and equipment, a CW can control all the adds you need to, and also debuff the entire room. While these things are vital to a team’s success, people still point to the paingiver charts to prove their perceived value.
If you are one of those people who believes there is only one way to play a CW, and that is max DPS, no team buffs, no defense, and be a true glass cannon, i have some suggestions for you:
Roll a fury lock, follow the melty faces guide: http://nw-forum.perfectworld.com/sho…-faces-and-you . A fury warlock ACTUALLY is a pure ranged DPS class, they are excellent at ranged DPS, so follow this guide, do insane damage, be happy.
Read Stox’s guide and do as he says: http://nw-forum.perfectworld.com/sho…haum-DPS-guide . This is a Mod 2 guide, but the CW changes should not have changed it much. Stox guide is _very_ DPS heavy, but also very squishy. If you like glass cannons, read this guide, do tons of DPS, be happy.
If for some reason you are still not satisfied, start a thread “MoF needs DPS boost” I will not complain, but I might laugh at the responses.
Of course, If you feel like trolling me – Heads, spikes, walls.
If you always think of your teammates first, you will eventually find that runs are much smoother, generally faster, and you will make friends and get invited back. The reason is people ask for high GS in LFG is not because its’ required, but rather they are using it as a proxy for an anti-idiot filter. The thought is 15k CW won’t have 0 lifesteal, overpull the group, yell at the cleric for heals, blame everyone else when they mess up, and die quickly at draco. I was farming CN at 11k (we were throwing then), but it is so easy to get GS now, i bet a 12k party can farm it no problem, if they are thinking about each others instead of themselves.
4 – What the Control Wizard (actually) is.
The Control Wizard is (shockingly, surprisingly) a controller. Your first and foremost job is to control the mobs so you and your team can be safe and DPS effectively. This is more true for Masters of Flame because we don’t have the pleasant restriction of Eye of the Storm plus Sudden Storm. This means we can fill our bar with up to four control spells and use them as we see fit, not just when our key feat procs. You’ll notice that when you don’t hold encounters or dailies, the MoF playstyle is much smoother than the SS playstyle.
Secondly, your DPS (and everything else, actually) on the floor is 0! You can’t do anything if you die! That’s why i tend to build a more balanced character between offense and defense, rather than going a pure glass cannon. Sure you can play a very squishy CW if the team is good, your computer is excellent, your connection is excellent, there is no server lag, there are no real life distractions, and of course there aren’t annoying charge att
acks like rage drakes (unless you dodge them perfectly, every time), but how often does that happen? I like to be able to perform in any group, in any dungeon, at any skill level, and that requires that i have to be a bit sturdier than some of the other guides suggest. Of course, you must build a character that feels good to you, and whatever that is will depend on a lot of things that I can not know.
Thirdly, with the ability to touch all the mobs, this means that carrying a debuff weapon enchant (plaguefire or terror) will improve the effectiveness of your whole team. When you can afford them, this is certainly the best option for you.
So if you can first control, second survive, and third debuff, then you will be in a situation to do real DPS. By piling the adds up and chaining encounter effectively, you (and everyone else) can do really good DPS to the mobs. Of course, if they are scattered everywhere and people are dying, your DPS will be terrible. Don’t think about it like “I have to do max DPS so i can be squishy and not control”; think of it as “I have to control and survive so that i can do max DPS”. The result might be the same when you overgear the content drastically (lots of dead things, very fast), but it really matters how you get there say when you are 10 or 11k and you are wondering, what should i get next?
A lot of the guides here are focused on speed farming – that is doing max burst DPS to kill the trash as fast as possible, so the runs are as short as possible, so we can get as many runs in as possible. I understand that, there was a time I was running 10 CNs a day. The thought is if you do 10 CNs, and you can save 5 minutes a run, well, that’s almost an hour. I get that. If anyone is wondering, I still go fast and clear under 30 minutes, so the differences between the two builds is not much time, in reality.
That said, what i hate most of anything, is wiping, for any reason, at any time. I want to repeatedly and reliably one-shot everything, even if i take different people, or a different class composition, or a different dungeon, etc. What i hate most is seeing the monsters stand over my corpse (which should always be the other way around). This is why I don’t worry that much about clearing trash mobs – not the elites, but rather the zombies and skeletons and archers, etc. If we put a DoT on them and kite forward in the dungeon, they are all going to tick, tick, tick, die anyway. What i want to do is get you through the more challenging encounters, because if you are having trouble with trash, you probably aren’t ready for the dungeon anyway. Being great at clearing trash might save you 2-3 minutes during a run, but being great at killing the boss will save you 2-3 wipes and many hours of frustration.
This build really thrives in fights and dungeons where there are a lot of adds, particularly when some of those are quite strong. Hence, Spellplague and the Draco fight will go well for you, but it’s important to remember that CW is fundamentally an AOE class. Some zones such as Malabog’s Castle, Shores of Tuern, and Lair of Lostmauth, are not CW friendly because they have smaller pulls with more elites. I actually think this is good for the game, because people tended to overstack CW for spellplague and CN, where the money was, and classes like TR (I love TRs), GF (I also love GFs) were overlooked because a) almost no AOE and b) low DPS. I am thrilled these classes have more use now and I want the trend to continue. That said, I still do great in these areas, it is just more balanced for all classes rather than CW domination. However, these are high-level, relatively elite zones and we must get through the lower level things to reach them.
5 – What race do I choose?
So now we know what we are doing, we are building a team oriented controller, who survives well in most situations, debuffs the mobs for the teams, then deals good damage, how do we most effectively choose a race? Personally, i tend to think this is a personal choice and all races will do well, but people often want to get the advantages they can get from a racial bonus. I’m not going to restate race info for you, but you can find them here: http://neverwinter.gamepedia.com/Race
Good Options:
Human – You can get 2 int points, 3% more defense and 3% more heroic feats, which is great. Humans, in general, are good for any class.
Moon Elf – +2 int, +2 cha, 1% stamina, 1% AP gain, CC resist and white skin – a great option. Stats are good and AP gain is key.
Sun Elf – +2 int, +2 charisma, 2% AP gain, CC resist. Maybe slightly better than Moon elf, but we are splitting hairs. These guys are excellent options as well.
Tiefling – +2 int, +2 charisma, 5% more damage to weak monsters, chance to debuff the mobs – great stats great bonuses.
Dragonborn +2 int, +2 cha, more crit, more power, more incoming healing – Dragonborn are excellent at everything, and the bag space you get as a bonus is amazing…
Moderate Options:
Half Elf – 2 con, 2 charisma, 1 in, some nice bonuses – it’s not a bad option, but it’s not exactly ideal.
Halflings – Halflings, with dexterity and charisma (or constitution) are a decent option, but their bonuses are very much for PvP. This is a PvE guide.
Wood Elf – Dex/Int, 1% crit chance, 10% slow resist – Meh?
Not So Good Options:
Drow – You can get 2 charisma for crit chance, but the 2 dexterity is largely wasted. Darkfire is nice, but trance is essentially useless, therefore this is not a good option.
Dwarf – Con/Wis bonus, resistance to knockback, eh… I only have seen one Dwarf CW and that was a joke…
Half Orc – Str or Dex and Con, faster run speed, and 5% crit severity – while the severity is nice the rest of the bonuses are useless to us.
Menzoberranzan Renegade – Quite honestly, if you are paying 200$ for this pack, you can make yourself a fat gnome CW, ride a donkey, call yourself Sancho, and follow around a GWF with an Int of 8.
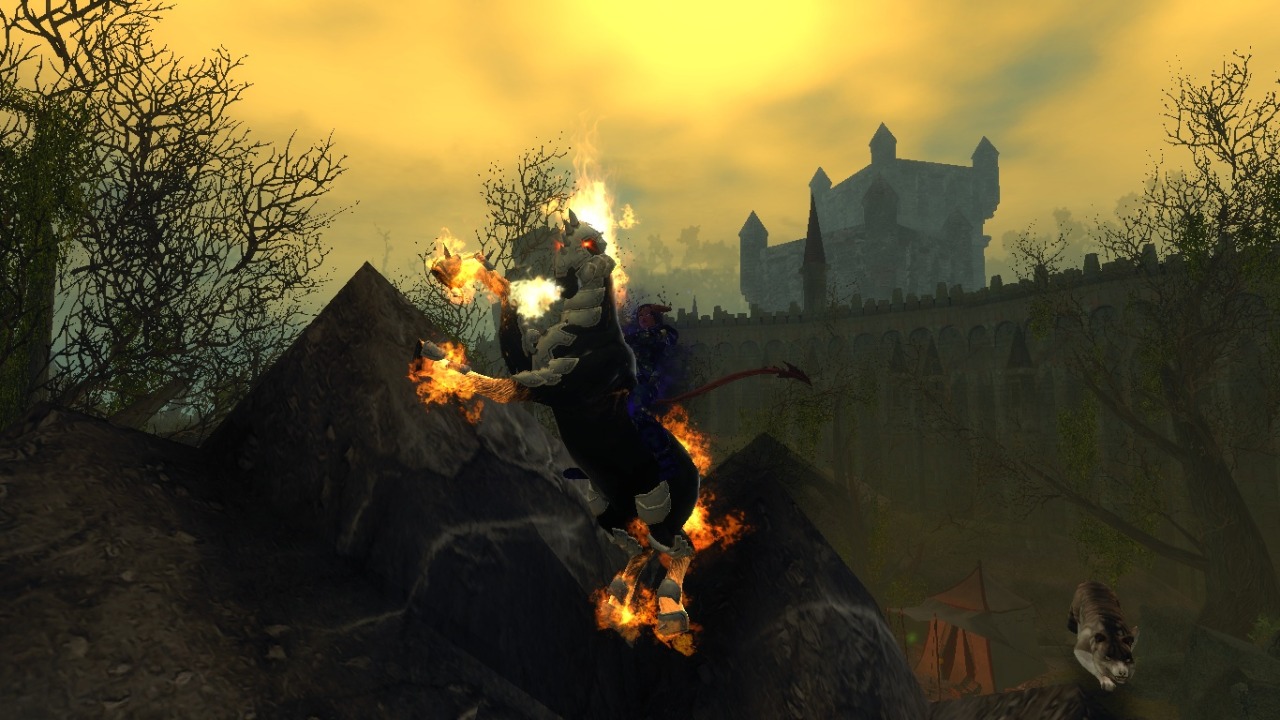
6 – Smolder
Smolder is a key mechanic of the Master of Flame wizard. It’s a DoT that is applied in one of four ways:
Fanning the flame encounter (possibly feated)
Furious Immolation Daily
Scorching Burst at will
Critical Conflagration class feature.
There are some issues with options 1-3. Fanning the Flames, while a pretty powerful spell, now has a long cooldown and only hits multiple targets on tab, and like all other spells it has a cap. If you feat it, then it can spread as things slowly die, but this is somewhat useless if things die relatively quickly.
Furious Immolation is a great Daily but even if you have excellent AP gain, dailies might come about once every twenty seconds, which is not often enough. Secondly, the target cap on Furious Immolation is 8, which means Oppressive Force is better for larger pulls, so you might use oppressive more often (depending on situation and playstyle).
Scorching Burst is great for building arcane stacks, but you have to stand still and charge it, the target limit is 5, the attack rate is slow, etc… Personally i really don’t like this at will, though i know some people who love it. I find it awkward, personally, as I’d like to cast and move, not stand rooted and charge.
So this leaves Critical Conflagration as the only reliable way of applying smolder. At rank 3, it also gives 15% critical severity (which is pretty great), and since you are going to be casting AoE spells often, you will be critting often and hence almost everything will have smolder on it after one full rotation.
Another wonderful thing about Critical Conflagration is that you no longer worry about applying smolder. Smolder happens, as you play, then you can focus on control, dodging, resurrecting those glass cannon CWs who died, sometimes resurrecting those glass cannon GWFs who died, and so forth. This also means you are not locked into using certain spells in certain slots, because as situations change you will want to change your bar to match the situation. There are times when your fire spells just simply aren’t the best option.
Since we apply smolder (key class mechanic), which accounts for 20-30% of our damage (depends on the dungeon and team composition), and also has the potential of applying a good debuff (swath of destruction), critting often is very important for Master of Flame CWs.
Almost all players in Neverwinter tend to overstack crit. Some classes (TR), get too much naturally, but some is just silly. Stacking crit on a Spellstorm CW is silly – as EotS makes it inefficient. So in general I would like to limit my crit on most classes – maybe 1500 or less for a spellstorm, about 2500 for other classes. Because of the gear I run, i have more crit on my CW than i probably should, but I will adjust once i get my artifact belt (low drop rate, very expensive), but that said because crit applies smolder, I think critical strike is more important for MoF CW than other classes.
Real Crit vs. Sheet Crit – While your character sheet will give you your crit chance (mine is 39.7% as of this writing), your real spells and abilities do not always crit at the same rate. For example, smolder for me crits around 60%, whereas creeping frost and warped magics crit around 30%. Some things, most notably assailant and weapon enchantments, cannot crit at all. I am not so sure why this is, but after looking at logs it seems some spells are more likely to crit than others, and they are often in similar order. (Any insights would be useful here.) Hence your sheet crit is illustrative, and not absolute.
Smolder and rimfire smolder – Smolder first starts as a fire DoT, but if smolder is hit with a chill stack it transforms into rimfire smolder, which is more powerful than the original smolder. This DoT is also refreshed whenever a new chill stack is applied, which means that if you use cold spells effectively (icy terrain is amazing because of no target limit), this DoT will essentially never end until the mob dies. This means while you are evading attacks, kiting, pulling other groups, etc., the monsters you attacked originally have their HP ticking away.
Secondly, in logs and paingiver, rimfire smolder is credited to whomever last refreshed the DoT. This is a great synergy because a spellstorm running with a MoF receives over a 5% DPS boost just by having you in the party. So for example, if the spellstorm does 41.5 million in damage, 2.5 million of that is rimfire smolder. This is a big reason why paingiver is deceptive for MoF CWs, because you are creating a lot of damage that is not credited to you in the log, but for which you are responsible.
Thirdly, if we are going to apply smolder to as many mobs as possible, it is important for us to hit as many mobs as possible as often as possible, hence we should be using spells with high target limits. Also since we should keep our rimfire smolder refreshed, it’s important to hit things with as many chill stacks as we can. This is why Conduit on Tab is so wonderful. In addition to surprisingly good damage, as it ticks it applies chill.
To me, the only downside of the smolder mechanic is that if the mobs die too fast it doesn’t get applied fully. This is why if you are massively overgeared and running with a high-burst spellstorm, they will demolish you in paingiver because their damage is mostly within the first few seconds, while all your damage is over time. However, since I assume most of the people reading this aren’t running with their 18k + friends who all have perfect vorpals, smolder is going to work great for almost everyone.
7 – Your stats and you:
For an in-depth guide about neverwinter stats and debuffs, you can look here:
http://laggygamerz.com/forum/index.p…neverwinter/#2
I think it’s an excellent read. If you read beyond the numbers it also becomes illustrative why debuff stacking is often more useful than personal DPS stacking.
Also, very important and interesting, is crit vs. power guide:
http://laggygamerz.com/forum/index.p…numbers-guide/
Reading this will make it obvious that going over 3000 crit, even with a perfect vorpal, is a bit silly. That said there are times when you will be forced to take a stat you don’t want. Recently i had to take a choice between Power, Hp, Deflection, ARP and Power, Crit, Recovery, ARP. I could use Power, Recovery, HP and Armor Pen, but i was overstacked on crit. However, since deflection is probably the worst stat for CW I elected to take the crit (overstacked, severe DR) instead of the deflection (relatively useless). It’s also important that since for us, crit isn’t just more damage, it’s applying smolder, it’s not quite as awful to be overstacked on crit.
After that illustrative example, let’s discuss what each stat does.
Power: Power a damage increase for all your spells, approximately 3% more damage per every 500 power in comparison to 0 power. This is a linear relationship and hence high power ratings do not suffer the same diminishing returns as other stats. However, before diminishing returns hit, almost all the other options are better. This is why high-end players all end up power stacking because they have nothing else to put the points into. However, power stacking is something for late game growth.
Crit: Increases your chance of landing a critical strike. A key stat for MoF CWs. You will often end up getting more than you need, but personally i wouldn’t try stacking over 2500. However it turns out key gear and artifacts for us have crit on them, as do the artifact weapons and artifact belt, so you will be in surplus without trying.
Armor Pen: This is a key stat for doing damage. I would try to get it to 20%, or around 2000. You often hear people say 24%, which is true for bosses (22% for a few elites), however a) the diminishing returns are harsh so you would have to spend 400-500 points for that 4% and b) it is only effective against very few adversaries, and c) in most fights the adds are the problem. Stox and i had a long discussion about this and we are in agreement, it’s inefficient to stack over 20%
Recovery: CW gear almost all has recovery on it, so you will naturally get “enough recovery”. Enough recovery is however much you need to go through your rotation and get your dailies up as often as you need to. I tend to recomend to new players to go up to about 3500, but not over as the DR hurts too harsh afterwards. That said, with the right artifact setup you can drop recovery (I believe i have under 3000 right now), but i wouldn’t reccomend doing this until you have the right artifacts.
HP: HP is like Power – there are no diminishing returns on HP. Likewise, this is why endgame players stack HP because there is nothing better to put it into. If I was just starting, i wouldn’t worry too much about it, because mobs in T1 or T2 dungeons that really hurt normally have slow animations or giant red circles as warning, and hence are pretty easy to dodge. Late game however, having close to 30k is pretty normal (i believe i have about 28-29k HP)
Defense: People often debate whether more HP or more Defense, and I think this is a “feel” issue. I tried higher HP and lower defense on my spellstorm CW and I felt much, much squishier than having good defense and less HP on my MoF. It is my opinion to stack up to around 2000 or 2500 defense and then go for HP, but going up to 3000 is not going to get you the results you desire.
Deflection: A chance at an attack doing 50% less damage. Since CW has no base deflection and the severity is only 50%, this means that a 10% deflection rate will bail you out 10% of the time when you take half damage. However you’d have to use about 1200 points, to get that 10%, resulting in an (average) 5% reduction in damage taken, but that only benefits you 10% of the time. It costs less than 1200 points to get more than 5% defense, and raising your HP 5% is much less too, so IMO this is a terribly inefficient stat for CW. I would lower it to 0 if i could, but sometimes you have an item with two great stats and deflection and there just isn’t a better option.
Regeneration: This stat is nice for things like… saving potions between fights, but in all honesty your Lifesteal will heal you much, much more than regen, even if you have a good regen rating. Add in the fact that Regeneration has very harsh diminishing returns and it is a really not so wonderful stat for PvE.
Lifesteal: Lifesteal might be the most important socketable stat for CW, since you heal yourself while dealing damage, and you should be dealing damage all the time. By increasing your lifesteal you will dramatically increase survivability. Hence I think most players should go for at least 10% lifesteal. It doesn’t make sense to go much higher, as diminishing returns are incredibly harsh, and you could possibly run a little less if you have endless consumption.
So what’s the most important stat for CW? It’s not on this list, actually, it’s AP gain. This is because when you are in a tough situation (party is about to wipe), Oppressive Force will bail the team out, do great damage, apply your debuffs, all with no target limit! It’s truly amazing. Hence it is _very_ important to have a high AP gain. Unfortunately, there are limited ways to get this. Feats (controlling action, critical power), your wisdom stat, your recovery stat, one boon, and artifacts. This will strongly influence our best in slot artifacts, but they are either expensive or difficult to obtain. After that, i suggest the following priorities:
Lifesteal to 1000
“Enough” recovery
ARP to 2000
Defense to 2000
HP = Power.
Crit is very important, but you should be getting it on your gear, artifacts, augments, and attached to other stats without worrying much about it. However, if you choose to use the High Vizier armor set, you will need to stack crit to compensate. In this case i would stack to 2500 crit, but not go over 3000.
Example:
Currently i have about 6300 power, 29k HP and 3k defense. My other stats are sufficiently capped such that gaining points there would do little to effect my play.
Now say I want to increase my power by switching my shielding jewelry (HP, Defense, Regen), for pain jewlery (Power, Crit, Recovery). Using radiants in their sockets. For approximation let’s say i move 4000 HP, 250 regen and 350 defense into 1000 power, 250 crit and 350 recovery.
Now where i am in my build, i will barely notice the crit or the recovery, and i don’t care about regen, so the trade effectively is 4000 HP + 350 defense for 1000 power.
Now, power is worth 3% of 0 power per 500 points. This means that I am already operating at about 138% damage, and i will incrase my power 6% to 144% damage with that 1000 power, which effectively 144/138 = 1.043, or 4.3% more daamge vs. where i am now.
On the other side losing 350 defense will cost me about 3 % DR, and losing 4k hitpoints is almost 14% of my HP, so in my eyes i am losing over 15% of my survivability for about 4% offense. To me this trade is inefficient, which is why i tend to have more defensive stats than most CWs. My damage is still good and i survive far better than most of my teammates
8- Ability Scores
Initial Rolls are quite important for CW. Unlike some classes (for example, Con is valuable for a DC, but it is a tertiary attribute), the CW’s secondary attributes are both valuable, and the CW’s tertiary attributes are not. There are many different initial rolls and they are found here:
http://neverwinter.gamepedia.com/Ability_Score_Rolling
Now, it’s important to note that unlike stats, which suffer diminishing returns, ability scores do not. Therefore these are straight up bonuses that can help you dramatically and you can push them as high as possible, which is a reason the artifact belts are both so excellent and so expensive.
It is obvious that intelligence is the main stat for a control wizard, with stright up bonuses for damage and recharge speed. Since we are an encounter based class, recharge speed is more important to us than a class that mainly uses at wills (TR comes to mind). But the other two stats are excellent as well. Wisdom gives recharge speed, AP gain, control bonus and control resist – which is pretty spectacular, while charisma gives you crit chance, companion bonus (applies to augment) and combat advantage bonus.
However, it is key to our build that critting often is extremely important to apply smolder. AP gain is also incredibly important, but we can boost that dramatically with artifacts, whereas crit chance, with its relatively severe diminishing returns, can not be boosted nearly as much through any sort of equipment. This doesn’t mean that wisdom is not great, but it does mean that charisma is more important in endgame.
When you are lower leveled, and less skilled, maybe have less of a budget or unlocks, it is very difficult to get the AP gain you need to really flourish. Remember, the ability to manage large groups of enemies is keyed upon getting oppressive force off quickly. Without it, we have to pull one or two groups at a time – which is fine for beginners – but i would pull the whole dungeon, boss to boss, if i could get away with it.
So this means the best finishing stats are 24 int, 14 wisdom, 24 charisma, which means we have to start off with 16 +2 int, 12 wisdom, and 16 +2 Charisma. This is why tieflings, dragonborns, and elves are such excellent choices for control wizards, and humans can possibly make it up with their extra feats.
But remember – our first and primary job is to be a controller, which we can’t do with a low recharge speed or low AP gain. So before you are geared well, I would put 4 points into int and four points into wisdom, THEN, once you have some artifacts to help out your AP gain, move those points back into Charisma. This is because when team DPS is low, the control is more important, but when team DPS is high and we can melt mobs down, control becomes less important, and your stats and abilities have to effect this transition as you move from early game (starting at 60, i consider leveling not really part of the game) and late game (CN speedruns, MC, VT, ESOT, ELOL).
As for the 300 zen (about 150k AD as of this writing) that you spend on a respec, in the scheme of things it is not very much. For example, refining one artifact to orange can cost upwards of 5 Million AD, and you have 3 artifact slots, an artifact weapon, and an artifact belt, so that’s a 25 million AD sink right there. Add in two perfect enchantments (another 10 million), pets (say about 7-8 million), and if we do rank 9s, (you have 24 slots), you can expect to spend up to 70 million AD to outfit your character fully. In comparison to that, 150k to adjust your spec to the right one is a footnote. It is something you could easily make in a day with leadership alts, or running dungeons (getting a little lucky, but not too much), or flipping on the AH.
A good thread full of useful ideas can be found here:
http://nw-forum.perfectworld.com/sho…ealth-Building
But as so many threads turn into nonsensical flame wars (remember guys, heads, sicks, walls), Melody had to close it.
9- Heroic Feats
CWs are in this great spot where if we had 30 points for heroic feats, we would gladly take them! Unlike many other classes, we would gladly take the extra points and use them very well. This is also one of the reasons Humans are good options for CWs – you get 3 extra feats (but would lose 2% crit chance, which might be worth it).
I was originally going to recommend Controlling Action to people, especially when you are undergeared, because remember, AP gain is the key attribute for CW. However, i dropped Controlling Action recently and I didn’t notice a difference at all. I heard this feat was bugged, and so it seems it is. So no points here.
Controlling Action: UPDATE – after talking with Stox the problem is our definition of control powers and the game’s of control powers or Controled is not the same thing. We don’t ACTUALLY know what counts, but it’s less than you’d think. This feat is woefully underpowered
Weapon Master – 3% crit chance is too good to pass up.
Toughness – Originally i didn’t use toughness, but now i do (dropped CA). Since CA is worthless you’ll need at least two points here.
Fight On – This feat is wonderful, and if you are undergeared I would definately put 5 points in here, as 10% recharge speed can really make a life-saving difference. When you have the right artifacts and boons, you can switch them out to more heavy skills.
UPDATE: It’s not as good as even i thought. This is not reduced like you think.
Say you have a spell, with a real cool down (RCD) and a base cooldown (BCD). You’d think they’d just multiply by .9 and call it good right? no. Formula is different. My theory is this is like control resist. where
RCD = BDC*100/(100 +CD mods).
So i have 25 int (15), 15 wisdom (5) and 2790 recovery (21.3). Which means my RCD is going to be BCD* 100/*141.3). or about 70.7 % of the base recharge.
Now say i have fight on, which would be 100/151.4, or 66.1 % recharge
So while the feat says 10%, the real difference is about 4.5%, making this HALF as good as the tooltip says. Factor in my recovery is lower than most CWs and you see that i am getting less than 1% a point. So if my chill strike cooldown, is say 10.6, i can take five points in fight on and maybe it’s 10.1s.
Or i can take 3 points in wizards wrath and a point in toughness and incrase my AOE DPS 3% and my HP 3%, which is probably more effective
Battlewise – if you get threat, you freeze/stun/kill. If you can’t do that, you kite. Wasted Points.
Wizards Wrath – AOE powers do 3 % more damage. Since almost everything you do is AOE – this is a great feat. If you didn’t take fight on, points go here.
Blighting Power vs. Arcane Enhancement. I think blighting power is better because typically your arcane powers are half your rotation at best, and you are stacking chill on everything. Extra points could go into fight on if you are undergeared, or a damage feat if you don’t need it.
Focused Wizardry – UPDATE: Focused Wizardy affects smolder, making it a must-have for any MoF CW. (double checked logs, respeced instantly).
Learned Spellcaster – I think this is a good feat, but I always wondered what it does exactly. If it’s a flat 5% DPS boost, it might be really nice. (Personally, i hate vague tool tips).
UPDATE
Ok, say you have 25 intelligence, this means you are your damage is 1.15 times base. 5 points in LS will give you 1.15 * (.05) = .0575, or about 6% DPS. So this feat works out to a little more than 1% DPS per point for most CWs (thanks to Stox)
Prestidigitation – Quite possibly the most overrated feat here. I know it increases your GS, but by endgame people are hard up against diminishing returns on just about everything but power, defense and HP, so when you transfer them all that crit, recovery, arp, lifesteal, etc… it doesn’t do anyone much good, nor quite honestly is it going to do you much good. (this is for MOAR GS MOAR GOOD people).
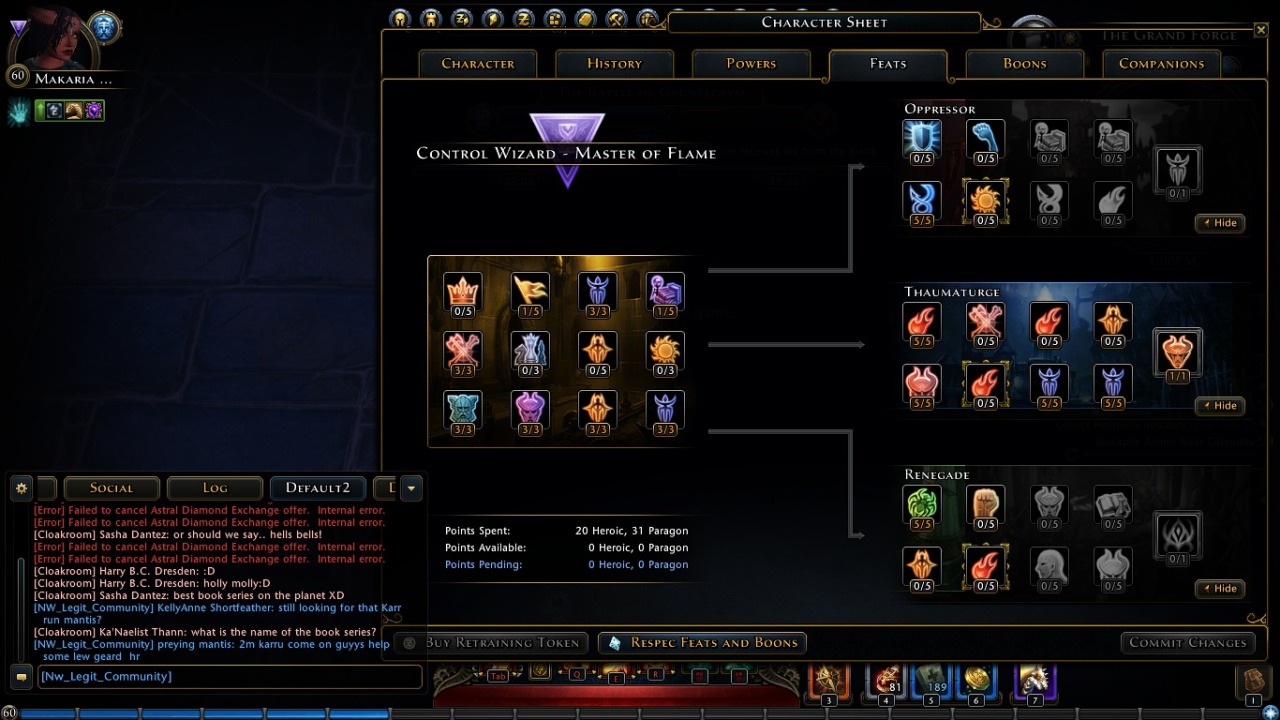
10- Paragon Feats
As of this writing, and i suspect since the game was released, thaumaturge has been the way to go. Even though assailing force was “nerfed” to assailant, it is still the best way to do damage.
We used to think that Renegade, especially with critting from EotS, was the was the way to go, back in Mod 0 and Mod 1, but it was soon learned that the best PvErs were rolling Thaum. Thaum had a different playstyle, at the time requiring conduit on tab (maybe sudden storm on tab and conduit elsewhere – this was before MoF was in the game), and the chilling cloud at will. Without testing whether or not this was effective, people tended to hate chilling cloud because of its slow animation (magic missile, after all, looks pretty cool), didn’t like conduit for the same reason (many people leveled with chill strike on tab, which is not particularly effective for dungeons unless you have burst like Stox), without testing again. What we all didn’t realize is that we were losing 20-30% of our DPS by using abilities we thought looked cool and felt cool instead of using abilities that were effective. Since then the population has caught on and switched, and the majority of high end PvE CWs are now Thaum. Renegades simply don’t do enough damage, especially because MoF CW’s don’t have eye of the storm, and the DPS you lose going to oppressor is not made up by the gain in control, unless you are straight PvP. (Please induce someone to write a PvP CW guide – thank you).
That said, Thaum is too good to pass up. Frozen Power Transfer can boost your power up to 15%. While i won’t say that you can always keep it up, let’s roughly say it equates to 5-10%. The DoTs in Elemental Empowerment, bitter cold and Warped Magics, count for, on average, 10% of your DPS. The capstone, assialint, accounts for 10-20% of your damage. The “problem” is that assialint can’t crit (another reason why vorpals are overrated), however it just kind of happens. This means 25% or so of our DPS comes from these three feats, which makes them pretty amazing. Neither Renegade nor Opressor comes anywhere close to that much.
The first two feats here are also excellent, Tempest Magic will boost damage if the targets are under 30% health by 5% – or a 1.67% DPS increase, and Malevolent Surge gives you 5% more damage when you kill a foe – which is basically all the time, unless you are in one of those rare single target boss fights. If a fight with a lot of adds, even if you are kiting and just throwing down icy terrian when you can, smolder and elemental empowerment will be tick, tick, ticking away (the moments that make up a dull day) and the mobs will eventually die. In a way, having so much damage as DoTs frees you to be a lot more mobile than if you were spellstorm.
NOTE: I heard Tempest Magic didn’t work with Tiefling Racial bonus, and I’m unsure how this interacts with the Fire Archon. I assume they have fixed it by now. If it is buggy, it is working some of the time. If someone has a clear idea what is happening (NOT hearsay and a RECENT test), please let me know.
As for our last two paragon feats, we have options. My personal favorite is Critical Power – which is not a damage increase, but rather once every 20 seconds you get a big bump in AP. It might sound unspectacular, but this is a significant boost to your AP gain – which i told you was key.
My second feat is bitter cold – which is 5% damage increase to targets with chill. Since you will be using conduit of ice, icy terrain, and chilling cloud most of the time, most of your targets will have chill on them. This uptime is not 100%, but close to it.
However, bitter cold has a big weakness – that is it doesn’t stack between other control wizards. I am almost certain that every spellstorm on the server has bitter cold, and most MoFs too, so if you are running with another CW one of your feats is negated.
Personally, i enjoy being the only CW, and many times I don’t run with other CWs. I don’t care if it’s a CW friendly dungeon, like CN, I really enjoy controlling tons of mobs, therefore I am going to keep bitter cold.
However, if you are in one of those stages where you stack CWs to make the dungeons easier, you might consider dropping this feat.
A Third excellent feat is Transcendent Master, which increases the damage of Shard of the Endless Avalanche (part of a normal rotation), and Icy Rays (excellent in single target fights). However, since the shard nerf, this damage increase is less – maybe 2-3% of total DPS, and the Icy Rays damage is nice for those few (but sometimes challenging) single target DPS fights. However, it’s not as much damage as bitter cold and I think crit power is too good to give up, but it’s also not much worse than those two, and I consider this a great option.
Three other feats which sometimes get thrown around are Twisting Immolation, Drifting Embers, and Reaper’s Touch. However, I think these are very build and playstyle specific, and while I encourage you to try them out, I still think the three feats above are better than these three.
11 – Boons.
For most of the stat boons here – I would take whatever you need more. If you are undergeared and squishy, take the defensive boons to survive longer. If you are overgeared and sturdy, might as well take the offensive boons for more damage. The truth is, I don’t play your character in your groups, so there is no way to know what is “best,” however, i have some thoughts here:
Sharandar:
Elven Haste is the way to go – that’s because AP gain is key. HP boon increases GS but is probably bad for us.
The fourth boon really doesn’t matter. Shadowtouched is so little damage and tranquility is so little healing you won’t even notice either.
The fifth boon – i think Elvish Fury is a nice DPS boost, so i would take that. If you need help dodging, the stamina boon isn’t a bad option. Fey Thistle is bad to being with and terrible on CW, and as for Redcap Brew – if you are built right you shouldn’t be drinking many potions.
Update: I have switched to Elvish resolve, and i’m happy with the change. Since i like to pull and kite and move a lot, this works well with my playstyle. I think extra stamina is always good for every class.
Dread Ring:
Evokers Thirst – this is just lifesteal over regen b/c PvE.
Forbidden Piercing – even if you don’t need it, Illusion Shimmer is so incredibly terrible i took Piercing on my HR with 3500 ARP >.<
Fourth boon – likewise irrelevant.
Fifth Boon – People want to take Rampaging madness, which i think is because it gives you quantifiable stats, but if you are built well the lifesteal will be too close to DR, the regen won’t matter, and the power is less than 4% DPS, even with 50 stacks.
Meanwhile Endless Consumption seems to increase your lifesteal by at least 50%, likely much more. It’s my opinion that Endless Consumption is the best boon out there and you simply can’t pass it up. Your survivability is night and day.
Icewind Dale:
Note – as of this writing i am still working on the fifth IWD boon. It takes forever (35 days), and each set of dailies is arduously long (maybe almost an hour).
I prefer combat advantage over AOE resist – both of these are very small boost (3.3%), and i doubt it matters much.
I prefer stamina gain over incoming healing – Think of it this way: Our lifesteal is already great because we took consumption and do really good damage, however, when we do die, it’s normally because of prone. Sometimes we can’t dodge because we are out of stamina, so this is a choice between lifesaver and irrelevant.
On boon 3 i would take the recovery over the 2% severity, because 2% severity is so small i wouldn’t notice it much at all (less than 1% dps). Personally i can run very low recovery, but I could see if your recovery was high, take the severity and then respec when you have better stat balance
Boon 4 – 200 damage is so amazingly irrelevant that Cold Resolve is a no brainer.
Boon 5 – I have not unlocked this yet, but i hear Winter’s Bounty is amazing. Since AP gain is vital to a CW, it seems like a no-brainer to me.
Tyranny of Dragons:
Take whatever stats you need for the first three. I haven’t gotten to the last two. I found a book and instead of these boons i am selling it for AD (please go buy my stuff!), but boon four lifesteal is obviously what we will take.
Boon 5 – Since incoming healing effects lifesteal, the top boon seems useless. As for the others, they all sound good. If you don’t have control pets, take the control bonus. If you die too often, take the healing. If you control and life fine, take the crit severity.
12 – A Note about Boons and Feats:
You’ll notice i don’t give you guys an exact “build” to follow. This is because what boons and feats are best for you is highly variable based on skill, gear, enchants, pets, team composition, dungeon, playstyle, etc… This means it is impossible for me to know what is best for you, so I would do your best job to pick what you think is best.
You’ll notice i say respect later – again this is fine. I have probably respeced my CW 15 times (paying for them too), because we have to test and figure out what builds are best for us at the current situation, and those situations really do change. We must be flexible and adapt to the situation to generate the best results.
13- Pets:
There are many, many good options for pets on CW, which is nice for us. I am not sure there is any “best” set of pets, and I think likely, what you would want to do at very high gear levels, is have multiple pets and switch them based upon the situation.
Augment – There are many augments out there! As for which is best, it’s hard for me to know. My guess is the chicken (two defensive slots for two edlrich stones for more stats), but chickens are insanely expensive.
Ioun Stone of Allure – The downside of the allure stone – besides the bugged bonus – is that it has an icon slot. Icon stats, unless you can get a MC/FD/Draconic I cond, are pretty lackluster in general. They give you power, crit, recovery, which you normally have plenty of. The upside is that the allure stone is (relatively) inexpensive and has power on it.
Cat – I have a cat, which i purchased back when i thought more crit and recovery were what i really needed. The crit seems unnecessary now. The main advantage of the cat is the belt slot – which is very flexible and you can just about any stats you want on her. The bonus, 200 deflect is not that important, but 50% fall damage has saved my life a few times. This is because a dragon wing flap and the hands at draco have a fall component to their damage, so while it happens rarely, it is nice.
Ioun Stone of Might – Good stats on the stone, flexible stats, and I think 5% stamina is a nice bonus – however they tend to be quite expensive to buy and upgrade. Also, no defensive slot for eldrich (but you might power stack instead).
Ioun Stone of Radiance – The Stats aren’t as good (recovery and regen), and the bonus is deflect (pointless) and lifesteal (you should have plenty, so I don’t think this is a great option. However, if you have one it is likely free for now.
Icosahedral Ioun Stone – Never seen one, incredibly rare. Good luck getting it.
Black Ice Ioun Stone – the stats are good and the slots are good, but since we are not using black ice gear, the bonus seems irrelivent to me.
Ioun Dragon Stone – good luck getting one! Seems like the allure stone but with a worse bonus. Might be good for cosmetic reasons?
Anyway, first thing to do is get an augment Pet, they are absolutely key for powering up your character and can give you close to 3000 stat points when summoned. Sure they seem expensive, and they cost AD to outfit, but in terms of AD to benefit ratio, this is very high. This should be your first big purchase.
Secondly, I like to run with control pets. This allows you to a) not stack CW, b) possibly run less recovery than you would otherwise need c) make short-manning dungeons much, much easier. If you get both, the 40% increase is quite wonderful. You could slot orb of imposition, but that would mean giving up one of our otherwise magnificent class features. They are:
Cantankerous Mage – 25% control bonus at epic
Wisp – 15% control bonus, 25% control resist.
Yes, it doesn’t increase your GS or your damage, but mobs that are frozen and stunned longer are easy to kill
UPDATE:
Recently i have been using my Pseudodragon, Chemthraxis. He gives me a nice movement boost, and while it’s not control or DPS, i have found the extra stamina very, very useful. A bit expensive and a pain to get (mine was a gift <3), but I think this is beneficial to all classes
Stat Pets:
In general, the purpose of these pets is to simply inflate your gear score so you can “look cool” and post “21k CW LFG” and silliness like that. It might be possible that an epic sellsword is good, but in general you can find a pet with a better effect than the extra stats. People who use these to get huge GS are just silly to me.
DPS Pets –
These are a collection of pets that increase your damage through effects rather than stats. Some of them are outstanding.
Wild Hunt Rider – 5% chance to increase damage 10% for 10 seconds on encounter use
This is probably the best CW pet, period, since that chance is taken everytime a mob hits and encounter. Hence steal time (many ticks) can proc it several times, as can icy terrain (no target limit) shard (15 target limit) conduit (many ticks) etc… At draco this procs for me, on average, once every ten seconds, which likely means an uptime well over 50%. It is simply marvelous and every CW should have one.
Laughing Skull – 500 Power and Recovery when you enter combat.
I don’t have one, but i have heard they are quite good. This will boost your damage at the start of combat and refreshes whenever you drop combat. If it’s your playstyle to clear group to group, this could be awesome. (Personally i only drop combat for doors, so it might not be great for me).
Dancing Blade – 5% crit severity
A budget Erinyes, this should increase your damage somewhere between 1 and 1.5%
Lightfoot Thief – Bleed effect upon crit.
I don’t have one, but would like one, as they are very expensive. That said, they used to increase DPS 3%, but i heard they were nerfed. (Someone please confirm).
Slyblade Kobold – 5% more damage against stunned or rooted targets
If this includes “frozen” and “slowed,” as mobs become with chill, it is a worthy investment, but if it just targets who are actually stunned, then it is probably not that great (again, someone please confirm).
Blink Dog – 5% more damage in combat advantage.
It seems about 20% of damage is combat advantage – so this would be about a 1% DPS increase
Powrie – It’s on here because I hate Powries. If I could hack neverwinter, i would go in and delete all of them.
Sprite/Flaming Sprite – 2% AP gain.
This might be a nice bonus, but 2% is a bit small in comparison to some of the DPS bonuses we could get, but if you need it, go for it! I just think there are better ways to increase AP gain.
Aranea – Lightning Strikes
As far as I can tell, this is more for the fact that Aranea is rare and cool rather than Aranea is good. I saw it’s log on a SW and it was very, very underwhelming.
Galeb Duhr – the more HP you are missing, the more damage you do (up to 10%).
How good this is will depend on how much HP you have while in combat. I feel i often have a lot of HP, so I don’t use it, but if you think otherwise, feel free to get one and test it out.
Vicious Dire Wolf – 5% chance to interrupt
I don’t have this pack, but i heard it is a very good ability. Could interrupt those very obnoxious charge attacks that do so much damage.
Intellect Devourer – 5% combat advantage damage
See Blink Dog
Phase Spider – 10% combat advantage reduction
While i don’t have one, seems this bonus could save your life (someone please test).
Panther – 10% more damaged against stunned or prone targets.
See Slyblade Kobold – but twice as good. I heard this is very good as well, someone let me know if slow/chill counts for this bonus please.
Eryness – 10% crit severity
Should increase your damage somewhere around 3%. A really awesome DPS pet, I will pick one up when i have the spare AD for it.
Fire Archon – 5% more damage to monsters with HP under 30%.
A 1.5% dps increase, when that damage finishes off the mobs. Relatively inexpensive (under 1M) for an epic pet.
Notes about pets – As you can see, there are many good pets for a CW, however of the 25 or so pets listed here, you can only use one augment and four other pets at any given time. Also some of them cost real money, or are very expensive and/or difficult to obtain, so there is no way I could possible get them all, upgrade them all to epic, and then test them all. That is too much work, money and AD for me right now.
However, if someone wants to buy me a Hero of the North pack, I would gladly test the panther for you (Please!)
That said, if I was on a budget I would get any augment i like, the Wild Hunt Rider (too good to pass up), the Mage and the Wisp (for the extra control). I consider the other pets more of a luxury purchase – they are quite expensive and don’t make a huge difference. Of the ones you could buy with a reasonable amount of AD, i think the Erinyes (3500 zen plus 750,000 to upgrade to epic), is a great idea. Sure it’s expensive but remember it’s account wide and there are other things in the Shadow Warlock pack.
Since i know some people like to sport their pets, maybe you just pick your favorite one, as many of them increase DPS 1-1.5%, you should just have the ones you like.
14 – At wills
Like all paragon paths, the MoF CW has four at wills she can use. Three are common to the class and one is a paragon at will. While, maybe more so than any other class, a CW is a encounters and dailies class, you should be able to get one or two rotations of your at will powers between your encounters or dailies – of course providing you don’t have to dodge or resurrect your squishy teammates.
A great reference for CW powers and abilities is below:
http://laggygamerz.com/forum/index.p…ard-abilities/
This guide seems to have been done after they adjusted Magic Missile and Chilling Cloud, but before they changed assailing force to assailant. This means we need data on how your at will powers interact with the thaum capstone. If anyone has this data, i would love to see it.
Magic Missile –
This is your bread and butter D&D at will. Has the benefit of looking cool and build arcane stacks. However, it has no AoE whatsoever, so if you are fighting more than one monster (most of the time), it is suboptimal to chilling cloud. Also remember that chilling cloud will boost our power with frozen power transfer, so it becomes outdated very quickly.
When to use: Before level 20, then scrap it.
Ray of Frost:
Ray of frost is a single target, relatively low DPS at will, however the benefit of RoF is that it builds chill stacks very quickly and freezes monsters. This is my preferred secondary at will power.
When to use: When there is a single monster that can be frozen. Also good in PvP.
Chilling Cloud:
This is more basic than bread and butter, this is like, agriculture at will. The third strike will a) proc frozen power transfer for up to 15% more damage; b) add a stack of chill the mobs, refreshing smolder c) do damage up to five targets in the area. It’s great.
Some people don’t like chilling cloud because of the animation. My advice is to get over it. There is no reason to not use chilling cloud, it is just simply better.
When to use: When you are fighting more than one monster, when you have frozen power transfer feat, so basically all the time.
Scorching Burst:
Scorching Burst is a chargeable AOE at will that hits up to five targets, builds arcane stacks, and starts a smolder dot. While theoretically it sounds great, you do have to stand there, charge and aim.
Personally my playstyle involves a whole lot of movement, so I like abilities that i don’t have to charge and aim easily, so i don’t use this. I have always found it awkward.
That said, some people swear by it, and the arcane stacks are nice. So i would say test it out. You might prefer it to Ray of Frost.
When to use: To start smolder and arcane stacks as you engage a group, then switch back to chilling cloud.
15 – Encounters
First of all, unlike every other class, CWs get FOUR encounters on their bar, and hence we can cast an extra spell. In terms of damage and control, your encounters will do far more than your at wills, and often times you dailies, hence CW is an encounter based class.
In addition, also unlike other classes, many CW encounters are good, and many more are good in certain situations, but not every situation. Thus during the course of a run, or run to run, we might change our bars more often than other classes. We also get the freedom to switch things up and still be effective.
Now to make things more complicated, each encounter has a mastery version, where the spell is charged to a higher power with a better effect, hence it takes a lot of knowledge and skill and experience to really understand what each and every encounter is doing. There is a lot of information here and it will take some playing time to really understand what to do.
Chill Strike-
Effect: a single target, hard hitting spell that adds a stack of chill
Mastery: it is now splash (target limit 5)
When to use: Single target fights it’s a good option. Many people level with it as it is good for soloing. However in dungeons it doesn’t really have the duration to be effective
Drawbacks: The animation is about slow, and can be hard to cancel, leading to getting smashed. Before it was impossible to cancel and i have died many times to chill strike
Entangling Force:
Effect: Chokes the target, lifting them off the ground
Mastery: Pulls mobs together (target limit 5), gains a stack of mastery per mob.
When to use: This has been nerfed to a PvP skill. It is no longer viable in PvE
Notes: EF used to be put on tab as it gave you AP per mob. They fixed this sometime in module one. While the gather effect is nice for team DPS, it has no stun and a low target limit, hence it is now relatively useless
Conduit of Ice:
Effect: Puts a icewind around the target, dealing damage over time to surrounding targets (1 primary, 5 secondary). Ticks six times.
Mastery: The AOE is larger, each tick adds chill, now can effect one primary and 6 secondary targets.
When to use: Basically all the time
Notes: Conduit on tab is marvelous, the chill adds control and refreshes smolder, and the damage is shockingly good. This spell is better than you would imagine.
Repel:
Effect: Pushes the mob back
Mastery: Now Pushes 5 mobs.
When to use: Epic Dread Vault with a low DPS party. Maybe.
Notes: We used to throw adds in spellplague, CN, and other places when our DPS was too low to kill them quickly. So you would cast a sing, lift the mobs up, and throw them with repel, which took quite some skill and timing. Crypic has now added many many invisible walls to prevent this and hence now the way to clear is to inelegantly power through. GG.
Shield:
Effect: Reduces first his damage by 50%, second hit damage 20%, then dissipates. You can also pop the shield to push enemies back and do damage (target limit 5).
Mastery: Now absorbs 80% damage, pushback is a little stronger
When to use: Hopefully never
Notes: A long time ago, popping shield had no target limit and generated AP per mob hit, so we could singularity, entagle, shield, something else, and what do you know, full AP again. You could effectively chain singularity without much gear.
Then Cryptic nerfed the AP gain, and so then shield was now useful for throwing (see repel) because of no target limit. Eventually Crypic nefted shield to target limit 5.
Now, shield is a “**** sign” to me, unless you are in Epic Lair of Lostmauth or Epic Shores of Turen (where the mobs hit abnormally hard). If you are using shield it means a) your gear is horrible, b) your build and stat balance are horrible or c) your skills are horrible. Sometimes a combination of the three. Before I got extra power points, I didn’t even put points here. They have nerfed it to uselessness.
Fanning the Flame:
Effect: A fire nuke spell with a DoT added. Applies Smolder.
Mastery: Now is AOE (target limit 5 I believe)
Feat: Drifting embers means that targets affected may add smolder to nearby targets when hit
When to use: Single target fights, maybe on mastery where the pulls are small.
Notes: People seem to think this spell is great, it will replace shard (which the community is down on right now), or free you from conduit on tab. Honestly, the cooldown is too long and while the damage is nice, there is no control. It’s a bit lackluster in most situations.
Icy Terrain:
Effect: Creates a patch of ice that adds chill and damages mobs that walk over it. It ticks often, lasts ten seconds or so, and has no target limit.
Mastery: You can now throw icy terrain to a target circle
When to use: I have only seen it on mastery to glitch bosses, which you should absolutely not do (go in and smash their face, please.) Even if you do pull it off it will take forever.
On your bar, it should be on there all the time. It is amazing control, it procs everything often, and it has no target limit. In addition a very short cast time means you can cast while kiting, slowing the mobs, debuffing the mobs and creating a great tick tick tick regen from lifesteal. Overall this spell is excellent. I would only take it off for single target fights.
Ray of Enfeeblement:
Effect: Increases damage to the target by 15%, also has a DoT.
Mastery: You can now cast it twice.
When to use: Single target fights. Also draco speedkills (we did this in mod 2 for fun). You can really melt him.
Notes: This spell should NEVER be on mastery. The DoT’s do not stack, and you have to wait the cool down for BOTH charges, hence you get double the debuff, but only one DoT at first, then it’s just the same as not on mastery. It’s a waste.
Icy Rays:
Effect: Nuke spell that can hit two targets. More damage if you target two different mobs. About the same as chill strike.
Mastery: Damage increased 50%
When to use: Single target fights.
Notes: A great spell that you actually can’t spec into at first (you have to take the other options), but is nice when you need it.
Steal Time:
Effect: Hits mobs for five ticks each, each tick applying slow, final tick hits harder and applies stun.
Mastery: Now creates combat advantage and increases run speed for team.
When to use: All the time except single target fights.
Notes: Steal time is incredible, does good damage, has a long stun, and procs all your feats and abilities. On Mastery, it is mostly to mess with your teammates, as it throws off their timing, which is potentially hilarious.
Shard of the Endless Avalanche:
Effect: Summons a big pall of power, which can be pushed (twice). The ball will slam and prone (one target at a time), then finally explode (ten seconds or when you hit two targets at once), which deals additional damage and prones. The target limit on the explosion is 10, not 5, not 15 (testing by me), but can prone more (testing by Carla Valentine).
Mastery: You can now summon and move the shard wherever you want.
When to use: Whenever you are fighting enough mobs to make use of the control.
Notes: The community is down on shard right now, because a recent nerf took most of its damage away. There is a rumor that it only prones 5 targets (obviously wrong). I confirmed the target limit for damage today and I’m trusting the word of my good friend for larger limits – which are often hard to see in dungeons.
So if you are like me and like to do big pulls – shard is still a lifesaver. Don’t listen to the detractors, this spell is still good.
16 – Dailies.
I have said over and over again that AP gain is important for CWs, and it might be the most important stat. This is not because CW dailies do tons of damage (even though the damage is good), but because CW dailies impose tons of control on the mobs. There are times when if you cast your daily, everything is fine, but if you miss your daily, the party wipes. That’s how important CW dailies are.
After they nerfed Sing, MoF CW is down to four effective dailies, all of which are great abilities and have their uses.
Ice Storm:
Effect: A burst effect, add chill stacks and knockback. Hits very hard (target limit 5).
When to use: GG PvP (what a blast!), situations where you have 2-5 mobs, particularly those who are control immune. A great example is LOL where you have encounters of 5 or less, several immune to control.
Notes: The knockback normally is bad for the party, so this daily has very limited uses, but is very nice in those situations.
Arcane Singularity:
Effect: Gathers mobs up into a singularity in the sky, then drops them. Effect is somewhat slow (target limit 8)
When to use: After the nerf (used to be 15 targets), Furious Immolation is better than Singularity in every way.
Notes: this spell used to be amazing, as you could gather the mobs and everyone could wail on them. Back in mod 0, CW job was to keep the singularity in the sky so everyone else could do their jobs. Those days are gone.
Oppressive Force:
Effect: Creates an oppressive force, ticks multiple times, stuns all the mobs, no target limit
When to use: Anytime there are greater than 8 mobs.
Notes: OF is amazing right now. When your AP gain is high enough you can do large pulls and solo dungeons and whatnot, all because of Oppressive Force.
Ice Knife:
Effect: A single target nuke, adds chill stack, prone effect
When to use: Any single target fight.
Notes: Ice Knife has the highest damage of any daily, but only affects one target. If you are facing 2-5 targets, ice storm is better, if it’s 6-8 targets, Furious immolation is better, and if it’s over 8 targets the Oppressive Force
Furious Immolation:
Effect: Gathers all the mobs together, quickly. Does good damage and adds smolder (target limit 8).
When to use: Any dungeon or situation where you are under the target limit.
Notes: Really an amazing daily, as it gathers the mobs together and maxes team DPS. The damage is pretty good and smolder on everything – so this is an excellent option for almost all dungeons. Oppressive force has the weakness of spreading the mobs out, so if you don’t have target limit issues, FI is the best option.

17 – Features
The biggest problem with CW features is that too many of them are simply too good and we only have two slots. Critical Conflagration is a must, but after that we have many excellent options.
Orb of Imposition:
Effect: Increases control effects 75%
This is nice when you are in a tough spot, but we have features that add a lot of great personal and team DPS. That’s why we use control pets and dps features, because the best DPS pets are nothing compared to a DPS feature.
Arcane Presence:
Effect: Arcane stacks now apply to cold spells
The truth is with this build, we don’t build that many arcane stacks and get our buffs from other sources, so this is rather pointless.
Chilling Presence:
Effect: increases damage by 3% per chill stack.
What a great feature! This means with 6 stacks of chill, our damage is increased 18%, and since most things have chill stacks, this might be worth 10% personal DPS, but honestly we have better.
Evocation:
Effect: Increases AoE power damage by 15%
Similar to chilling presence, this is also a great feature. However we do have better ones.
Combustive Action:
Effect: Every time you kill a monster you get action points. Also smolder and fire do 18% more damage.
When to use: When you can’t get enough AP.
CA can allow you to get your dailies up wicked fast, allowing you to spam oppressive force. However, we give up a good amount of persona DPS vs. Evocation or chilling presence or team DPS vs. Swath of destruction.
Critical Conflagration:
Effect: Critical hits now apply smolder, also add 15% critical severity.
When to use: All the time, quite literally.
Crit Conflag might be the best class feature in the game. You add smolder with every critical hit, and increases crit severity by 15% – which is better than a lesser vorpal. Considering we crit often and smolder is up to 30% of our DPS, this feature might make up one third of our DPS. It is far too good to pass up and you should never, ever take it off your bar.
Swath of Destruction:
Effect: More Smolder Damage (45% i believe) and targets take more damage (15% i believe).
When to use: Every time you are forced out of it
Swath is really an incredible dps boost – your personal DPS goes up at least 10% and team DPS goes up 15% (based on tooltip, hard to tell for real. If someone knows, let me know), making it’s really incredible because it debuffs for the whole team. The effect is very noticeable and your teammates will love you.
Many people love combustive action because of the AP gain, but if you are getting enough dailies (which you can do if you are built right) it becomes overkill.
18 – Armor Sets:
First of all, something like your armor set is very important. Each set has a set bonus, which varies from near worthless to outstanding. I have personally tested most of these.
Some people wear 2+2 armor sets for an extra 450 power, or to inflate their gear. This is silly, as in terms of DPS the High Vizier set bonus is equivalent to at least 2000 power to everyone because of the strength of the debuff.
When you see someone wearing 2+2, or has something stupid like 2500 lifesteal or whatever, it is just showing you that they have no fundamental understanding of the game. Maybe they have some skill, but this tends to be associated with an unpleasant, selfish personality. 2+2 is saying “I would rather look good than be good.” I have no patience for such people.
GG Set:
Champion Mage –
A set where the mastery slot recharges very fast, might be useful for fanning on tab. It’s the only set to have armor pen and the HP nice nice. However, this is only good for a starting set, as there are better options.
Tier One Sets:
Fatebender –
A set where your at wills will power up your encounters, but unlike a stormspell, our damage is mostly proc based, not encounter based, so a pretty meh power. The stats, it is heavy on regen and has no crit, so those aren’t good for us either
Focal Magi-
A t1 crit set, your control encounters can give 225 power and recovery to neary allies. The stats are fine, but the buff is a bit lackluster, amounting to 1-1.5% DPS. We have better options.
Archmage –
A set where your control powers reduce cooldowns. The bonus is nice, i have heard of a oppressor build where you can chain encounters very fast and become a freeze bot – but you would do no damage.
A set where there is deflect, regen, and no crit. the stats aren’t great for us, but it’s still the best T1 set.
T2 Sets –
High Vizier –
The set bonus will boost your defense and hurt the monster’s defense. It used to be 10% per stack, but i heard it was nerfed (someone please confirm). Still this set bonus is outstanding.
That said, it has no crit, too much recovery, deflect and regen, so the stats are pretty terrible for what we want to do.
If you do choose to wear HV, and some MoF’s do and wear it well, you have to stack crit elsewhere, which will limit your stat distribution.
Magelord –
A set with more power, regen, and no crit- the stats are not ideal. The set bonus gives you 900 recovery when you hit something with 75% of its hit points. Honestly though, if you have enough recovery, 900 will be barely noticeable. Hence this is the worst T2 set (I would much rather use archmage, which has a useful bonus).
Shadow Weaver –
With high defense and high crit, and no wasted stats, the Shadow Weaver armor set looks like it is made for Master of Flame. It is perfect for us. The set bonus, up to 18% crit severity and 400 lifesteal to your team, is very nice and stacks quickly in combat. The downside is that there is some sort of weird cooldown if you drop combat. That said, you should never drop combat and it should have an uptime of 50% or more.
So the high vizier has the best set bonus, but Shadow Weaver is tailor made for us for sure. The Shadow Weaver bonus is still good, so I would recommend this to most MoF CWs. If you stack CWs, 80% of CWs are Spellstorm and 95% of those wear high vizier. A spellstorm without high vizier is ignorant at best.
Tier 2.5 Sets –
Fabled set –
The Fabled set has slightly more stats than high vizier, so you would think it would be better but know. I tested it and the set bonus boosts your DPS by a whole .3% or so. I thought it would be good in PvP, but no also, maybe 1-2%.
That said, it looks incredible and makes a good transmute.
Dread Legion –
This set will give you deflection, which is relatively useless, and likely make you way overstacked on lifesteal, though you could account for that by droping lifesteal from everywhere else.
The set bonus is a small DoT that doesn’t proc often enough and takes too long to tick, it’s 125 damage per second, sometimes. It’s overall terrible.
Some of you who like evil looking CWs tho, really value this for it’s transmute. Personally, i think it looks like a bad skeletor costume.
Black Ice Gear:
I took a long break from neverwinter and IWD takes forever, so I have not had the opportunity to craft and test them. First of all, they look like they are tailored to PvP, which is NOT the subject of this guide. Second of all, they don’t have the crit we need. Hence i am going to guess this is not optimal for what we are trying to do. When I have tested these, i will update this section.
Draconic Set –
This set costs you a ton of crit and recovery – which we need – and gives you a ton of armor penetration and lifesteal, which we normally don’t, though again i suppose you could change your jewelry and gems for that.
My teammates said the set bonus reduced their cooldowns maybe half a second to a second, which they barely noticed. This is because of how cooldowns are calculated. The formula is:
CD = C*100/(100 + x), where X is the recharge speed increase. This means the larger X is the less benefit you see. Also some spells (example, astral shield), have a limit where they can’t come off cooldown any faster. This is why, for example, stacking recovery to the sky is so ineffective.
Hence, i was pretty underwhelmed, though I did notice faster cooldowns. That said, if you want to use this set be sure to get items so you have enough crit.
WHY CRIT IS SO IMPORTANT:
Remember, the key mechanic of our build is smolder, and the key way we apply smolder is by critting. It does a large amount of damage, it debuffs all the mobs, and the effect is easy to refresh. A MoF CW who can not apply smolder effectively will do comparatively wretched DPS, not apply debuffs well, and not help your team much. At that point, you might be better off with a PvP Spellstorm Oppressor. So if you build a MoF, you must always watch your crit raiting, keep it as high as you can without suffering diminishing returns (i would say close to 3000).
I know in the power v. crit guide, it will recommend less crit for 90% severity, but that’s for just pure damage from crit, not from smolder procs. We cannot follow that guide for this build.
Note: In case you had to be told, the best belt is the INT artifact belt. The reasoning should be obvious by now.
Alternative build:
Kaelic has a good alternative MOF build using HV set and combustive action instead of critical conflagration. You can find it here:
http://laggygamerz.com/forum/index.p…-cws-handbook/
The thought is that HV does do more dps than shadow weaver, and if we use combustive action, crit is not as important as if we run critical conflagration. The way we then apply smolder is by spamming OF.
The downside of this loadout is I have not seen someone apply smolder effectively (in a dungeon) without critical conflagration. Now if there is someone out there who can, let me run on something other than my CW and I’ll log it.
Now if your crit is high enough you can use critical conflagration AND high vizier – which is awesome!
However, this means you have to stack crit, since HV has no crit. If your gear level is low, those points have to come from SOMEWHERE, which means you are losing out in some other category.
That said, I would certainly try and test new things out. I think we all have different playstyles and our gear, spec, and playstyle must be synergistic. Feel free to experiment, it’s how we learn new things.
19 – Weapons:
When you start out you should probably just get the best purple you can get your hands on. Even a drake seal weapon is fine for the begining. However, pretty soon you will want to upgrade.
Ancient Set –
These are nice weapons, found in Castle Never. Since the introduction of the other dungeons, their value has fallen and you might be albe to get them relatively cheaply.
However, if you have skill, some AD, and a decent network of players, you should be able to farm better weapons for free.
Dread Legion Weapon Set –
A farmable starter set, found in the DD chest of VT. These weapons are nice and tend to have lifesteal. They are hardly the best in slot, but they are free and relatively easy to get.
Fomorian Weapons, Fallen Dragon Weapons, Draconic Weapons –
The weapon damage is the same, personally i’d look at them and see what stats you would need. Personally, I like the draconic talisman for late game (crit, arp, HP), but the orb has a lot of deflection. The 2 set HP bonus is nice. The FD weapons tend to have more lifesteal and the fomorians have more power but regend and deflect, so there is a tradeoff there.
Any of these sets are nice, but right now the Fomorians and Fallen Dragon take a lot of effort. They require level 20 artificing, tools up to 100% quality, and 3 materials from either VT or MC that cost a fair amount of AD have a low drop rate for farming. I am not sure they are worth the effort.
The Draconic weapon is found from the DD chest in the Lair of Lostmauth, which takes a while to unlock and isn’t easy to complete. However, it does have the huge benefit of being free.
Artifact Weapons:
The best in slot weapon is currently the Chilling Eye of the Golden Dragon – which gives a good buff to Chilling Cloud (something we use all the time). The other weapons aren’t applicable to our build.
The downside is that refining this weapon to legendary is very expensive. Getting it to epic, however, is not. At least in comparison to everything else we are using. I would get this ASAP and start refining it to the point where it’s usable.
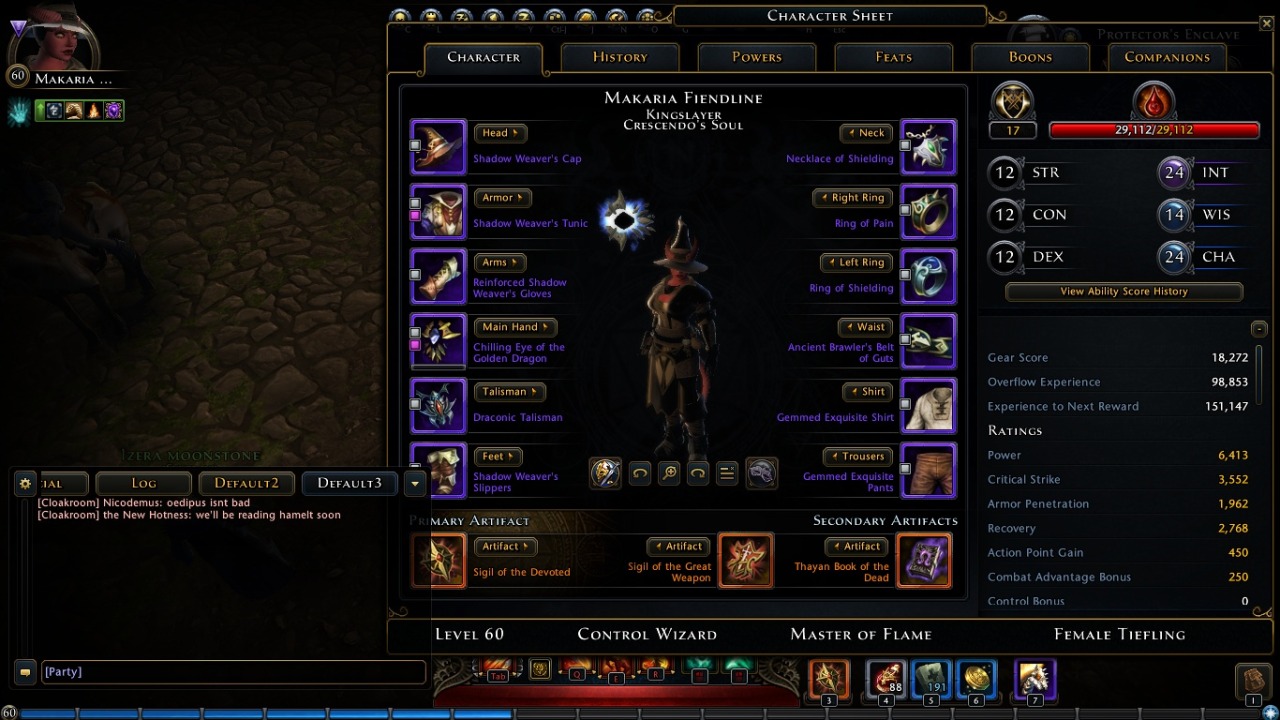
20 – Artifacts:
CW has some rather incredible artifacts to use, but the downside is the best of the lot is either very difficult to obtain or very expensive.
BIS active – Sigil of the Devoted.
This artifact will recharge your AP. At legendary, it’s a free daily. which is truly amazing. Normally dailies will take around 30 seconds to get up and now we get an extra one every two minutes, which is amazingly impactful. I can’t tell you how wonderful this thing is.
The downside is you have to get a cleric, on your account, through the introduction of icewind dale. This is a substantial time commitment, and if you don’t like playing clerics, it might be rather unpleasant. In addition, DC is by far the slowest and most painful class to level, so while the benefit is great, the time cost is significant.
BIS Passive – Thayan book of the dead,
This artifact gives AP gain, crit, and armor pen. This means you are free to not socket armor pen, you get crit you need, and a significant AP gain boost (5.5% at legendary). A truly amazing artifact, even with just this, you can drop a bunch of recovery and still get your dailies up quickly.
The downside is that you either have to pull it from an unearthed lockbox or buy it off the auction house, where they can be very expensive.
BIS Passive 2 – GWF
The artifact gains HP, Power, and armor pen. This lets us unsocket more armor pen, and gives us two stats without dimishing returns. Really a wonderful passive.
Other Artifacts –
Because acquiring the best lineup above is either costly in AD, time, or both (though leveling a GWF is a faceroll), you might not have access to these three artifacts, so what would you do then:
Start Artifacts –
Lantern of Revelation – Crit, Arp, Combat advantage.
Two stats we need and a bonus to armor pen is nice, and the effect isn’t half bad either. It’s a good option.
Waters – Def, Recovery Regen
The waters are good on just about every class, because (especially when undergeared), defense and recovery and nice, and the regen is a bonus. I don’t think taking waters or Lantern is a mistake, and if you want the other one they are relatively cheap on the AH.
Catalogue – Deflection, Movement, Gold Gain
About the worst stats you could imagine on an artifact. I can’t even understand the possibility of thinking this might be good.
PvP:
Bloodcrystal Skull – Recovery, Regen and stamina gain
The Stats are nice, but hardly our priority. The effect is the real highlight, bailing you out of a tough spot with temporary hit points. However, you will replace it with something better.
Dropped Artifacts:
These artifacts are rare, difficult to come by, and expensive. I would think carefully before investing in them.
Emblem of Seladine – Defense, Lifesteal, Companion Bonus
The stats are ok, the highlight is the effect, which helps the party out defensively. It used to be great in PvP, but has since been nerfed. I think we have many other, better options.
Eye of Lathander – Defense, Lifesteal, Incoming healing bonus.
Slightly better than the emblem, with the cool effect of resurrection at a distance. The downside is you need adamantane gauntlet, open the chest in a dread ring lair, and get very lucky. Considering there are better options and it’s a pain to farm, this really isn’t worth it.
Shard of Valindra’s Crown – Power, Lifesteal, Control bonus
The control bonus maxes out at 5.5%, which isn’t much, and we can get power and lifesteal easily elsewhere. Add that it is expensive with a low drop rate, and we have better options. Pre Mod 3 this was a high-end status symbol.
Lostmauth’s Horn – Power, Armor Pen, Control bonus.
Nice stats, but not as nice as the BIS options, because the control bonus is weak. It can drop (bound) in Lostmauth’s Lair, or from the boss. If you find it on the AH, it tends to be very expensive, at which point you should just buy the book.
BI Beholder – Recovery, Armor Pen, Combat Advantage bonus
Personally, i think this is a worse version of a lantern. If you get one, sell it.
Omegha’s Token of Movement – Defense, Deflect, Control Resist
Despite this is the token of my personal god, Defense Deflect and Control Resist? i think this is pretty pointless. If you get one, sell it.
Heart of the Dragon – Power, Defense, Regen.
If you bought the dragonborn pack, power and defense are great, and the regen is a good bonus. You will want to replace it eventually, but it’s not urgent.
Kessel’s Spheres – Power, Arp, Combat Advantage.
Depending on your crit, this might be better than the lantern, but i would personally sell it and get the book.
Black Ice Sphere – Recovery, Lifesteal, Control
A worse version of the already overrated crown. Sell it.
Rod of Imperial Restraint – Recovery, Lifesteal, Control
See above
Forgehammer of Gond – Power, Deflection, Control resist
If you have this you either sold it for a ton of AD or you are using it for professions, not stats.
Sigils:
These artifacts are gotten by getting a class to icewind dale. While it is a bit of a pain if that is the only reason, i like all the classes. Once you get them, they are an account-wide unlock.
Sigil of the Scourge – Power, Deflection, Stamina
If it was Power, Defense, Stamina it would be good. Deflection makes it meh.
Sigil of the Trickster – Crit, Deflection, Combat Advantage.
Like a lantern but worse. Next.
Hunter – Power, Recovery, Stamina.
Recovery is certainly better than deflection, and i like the stamina gain for sure. This isn’t a bad option, but you probably have better.
Guardian – Defense, Deflection, AOE resist.
Certainly you have better options than this.
Controller – Power, Crit, Control Resist.
The downside is that the control resist isn’t that much, but the upside is you will absolutely get this artifactTherefore i might use it temproarily until i got something better
Banners:
Banners come through the PvP campaign. I don’t PvP so I don’t have any, but they are certainly popular and useful in combat.
Defenders – Defense, Regen, Incoming healing.
You have many better options.
Tactician – Crit, Movement, AP gain.
If I had a banner, i’d take this. Crit is vital to us, AP gain is vital to us, and honestly i like the movement. The book is probably better (armor pen instead of movement), but this is a very nice option.
Vanguard – HP, Power, Lifesteal
This is like the budget GWF sigil, only we have lifesteal instead of arp. Since you could make up for it by switching your gems, these are very close, so another good option.
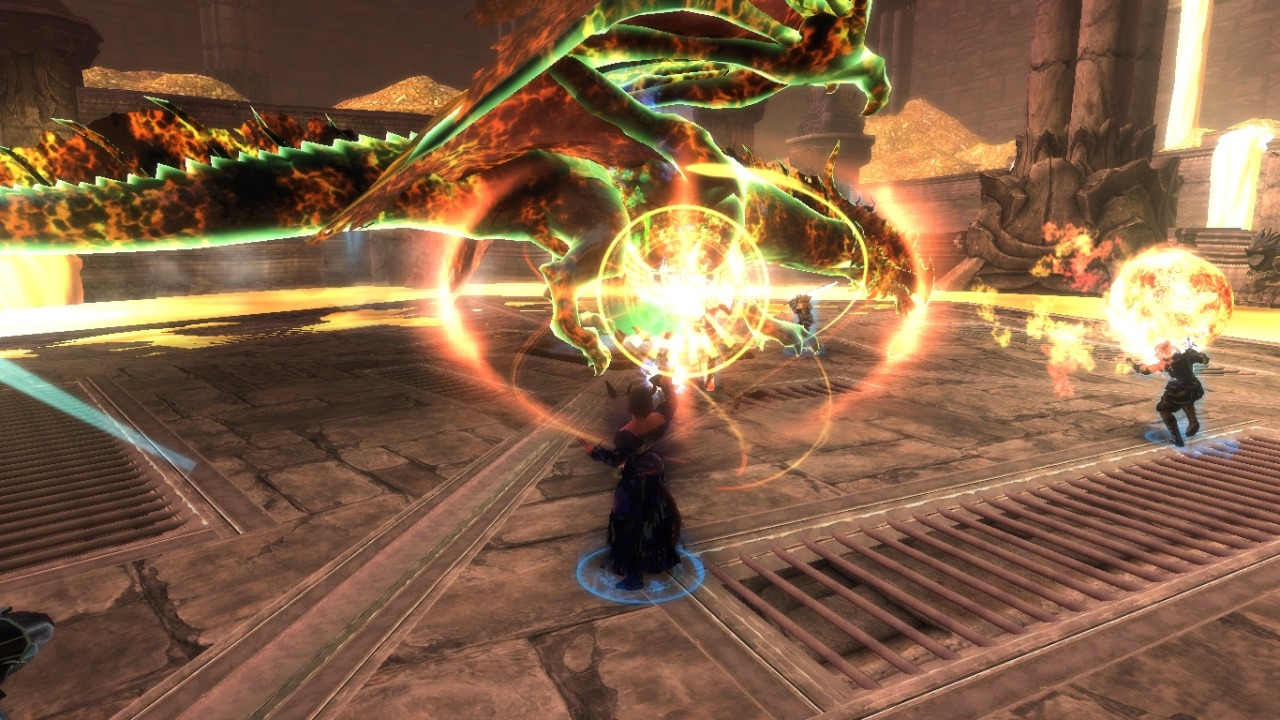
21 – Jewelry and Enchantments
This section is short because in all honesty, there is no best in slot item, rather there is something that gets you whatever you need most to help your character balance your stats.
When you are starting out, you can cheaply pick up the Hrimnir set, which gives you a boost to all your stats. Since you are undergeared, you need help everywhere
Slightly better would be the jewelry from Malabog’s Castle or the Dread Ring campaign, which is +80 to everything except power and HP. Yes, late game, you stack power and HP, but that’s because everything else is at diminishing returns. If you are under diminishing returns, these are some free options to improve your stats.
The ancient rings you will come across farming Castle Never or buy them at the auction house. Only the (massively overrated) control rings are expensive. That’s because if you have decent equipment and artifacts, you will have enough crit and recovery naturally. The other ones are relatively inexpensive and let you boost target stats, which is eventually better than boosting all stats.
There are then some great rings that drop from the Lair of Lostmauth which you can use to min and max your stats. They are slightly more effective and more points than ancient rings, so I am currently using these.
If you have a cat, the belt of Xvim – HP, Power, Defense – is great, as these are the three stats that you probably won’t be hurting on diminishing returns.
Hence, you need to customize these things, and your enchants, to get you whatever statistics you need.
As to what you need, i gave you guidelines in the stats section, but these are just guidelines. You must adjust to what YOU need based upon what you are doing and how you play.
22 – Armor enchantments
Soulforged is the obvious choice here, as it lets you come back to life and recover from errors, lag spikes, and phone calls. There is no need to go more than a lesser, making it much more affordable than many other options.
Barkshield is a nice option as well, think of it as a damage sink on top of your HP – somewhat like temporary hit points. It makes it very hard to get one shot. The downside is that the shards are bound and annoying to farm (only the master of the hunt skirmish), making it substantially expensive.
Every other armor enchantment i’ve seen/tried/heard about is more for looking cool than working well. Sure, some tankier classes can make good use of these, but even with a high defense rating, your armor is still cloth.
23 – Weapon Enchantments
Class A:
The two best options here are Terror and Plaguefire. At Perfect Terror/GPF both apply about 4% personal DPS boost and 4% team dps boost (if the DPS is evenly distributed, about 24% of your personal dps). The reason why it is this is great on our CW is that we use as much AOE as possible, blanketing the entire room in the debuff, while other classes either have lower target caps, slower attack rates, smaller AOEs, or most likely, all three.
It is the nature of CW rotations to make CWs the best weapon enchant debuffers in the game. If you care about winning more than paingiver this is certainly the way to go.
Class B:
Perfect Vorpal – for the sake of this argument, i’m going to assume a good, but not great, crit chance of 35%. My CW is pushing 40%, and because of the limits on diminishing returns, it would be either very difficult or very costly to raise it higher. We are also going to assume 90% base severity, because we have critical conflagration slotted with 3 points.
This means we hit with 100% damage 65% of the time and 190% damage 35% of the time, for an average of 131.5% damage. With a perfect vorpal we hit 100% damage 65% of the time and 240% damage 35% of the time, or dealing out 149% damage. This is a (149/131.5) an increase of 13.3% DPS. When you add in the fact that assailant can’t crit, the real increase is somewhere on the order of 12% personal DPS. Now remember terror/plaguefire increases personal DPS 8%. So in order to use a vorpal 4% of your DPS must be greater than 4% of everyone else’s DPS put together. Since it is very, very unlikely that we are personally responsible for over 50% damage in the run, a vorpal is nowhere near as good as a terror or a plaguefire (though we will win paingiver).
Perfect Lightning – My friend Carla Valentine developed a special, custom P.Lighting MOF build whereby the enchantment increases her DPS around 19%, making it comperable to a terror or a plaguefire. She is not inclined to share the details of the build with us, but maybe that will change someday.
I personally tested a perfect lightning in Epic SOT, where it accounted for 6% of my DPS. However, ESOT has small mob groups, so i am not getting the full chain effect. If we were in Castle Never or Spellplague, we would expect to see a much larger DPS increase, but if we were single target we would expect to see a smaller DPS increase. That said, vorpal is probably better for less targets and lightning is probably better for more targets, though in most situations terror or plaguefire will be better options.
Class C – because you are so special and different!
These enhancements aren’t as good as the other ones, but might still be useful. They are Feytouched and Bronzewood (please see my enchantment guide for more information). If you are a super girly CW and want a pink orb, try the feytouched, it’s not bad. The bronzewood is also not bad, and i’ve seen it been effective in PvP, but its main advantage is the fact that it is cheap in comparison to other options.
I would be intrigued to see a perfect frost enchant. So if there is a MOF CW with a Perfect Frost, let’s run CN together, ok?
The other options really seem lackluster to the ones listed here, and would be more expensive and less good, so we shouldn’t consider them.
24 – The basic setup
Ok, so for our basic rotation we are going to run conduit of ice (mastery), shard of the endless avalanche, icy terrain, and steal time. The question people will be wondering at first is, why this bar?
So remember, a very large proportion of our damage is secondary abilities – that is assailant, smolder, rimfire smolder, creeping frost, and warped magic, can account for up to 50% of our damage output. The nice thing about this is that these DoTs can happen even if we are hanging out at the campfire and reading a book. So the way we want to proc as many of these secondary abilities as possible is we want to hit as many mobs as possible, as often as possible.
Secondly we want to add chill to as much as possible as often as possible since chill stacks will refresh our smolder DoT and keep it going longer. This bar allows us to accomplish both goals relatively easily and with all our encounters, leaving us to choose whatever encounter and positioning is best for the given situation.
A third wonderful thing is lifesteal. Most classes get lifesteal in bursts as they swing their encounters and then are lacking during cooldown, however with all these DoTs, a MoF CW has lifesteal that acts like the Jose Canseco of Regen, with enough steroids to go around. As you are dodging, kiting, casting, or reviving your squishy teammates, your life is healing back instantly. The wonderful benefit of this is outside of ESOT and ELOL where the mobs hit like trains, i basically never use potions.
The fourth wonderful thing is this is an amazing control bar. Two freeze spells, a group prone, and a group stun means that unless we pull a huge number of mobs, we can almost keep any monster permanently frozen. They just stand there while our team relentlessly beats them silly.
So let’s review the encounters quickly:
Conduit of ice mastery: Ticks 6 times to one primary target and 6 secondary targets adding chill (refreshing smolder) every tick
Shard: Damages 10 monsters, proning more, builds arcane stacks
Icy Terrain – Ticks many times (forget how much, honestly) for about 10-12 seconds, unlimited target cap
Steal time – ticks 5 times over two seconds against 5 mobs, leaving them stunned.
Hence, say we pull 10 monsters and go through a rotation. That is 42 ticks from conduit, 10 hits from shard, 100 hits from icy terrian, and 25 hits from steal time, meaning we have hit them 177 times ( :O!!! ) in one rotation. Now when you consider that each hit can proc smolder, swath of destruction, our weapon enchantment, the wild hunt rider pet, and in addition can freeze/stun/prone, in the course of one rotation we have controlled and debuffed the entire room. If any survive our team will either beat them senseless or the the DoTs will tick tick tick away and the mobs will die. If they survive to our next rotation, we can just freeze/stun/prone again and they will die eventually anyway. This is why i find it relatively easy to solo epic dungeons on my CW – unless i pull a group way over my target cap i can keep them controlled relatively easily.
Your Features:
This is simple, critical conflagration is essential and quite honestly, a MoF CW is relatively worthless without it.
Secondly, i would slot swath of destruction, as it increases your damage and your teams damage substantially (maybe as much as a GPF enchantment). It is really, really good.
If for some reason you find yourself short on action points, you can slot combustive action – which is an excellent feature – instead of swath. The team DPS will be significantly less, but you will get more dailies. You must consider if the situation mandates this trade.
Your Dailies:
The two dailies are going to be Oppressive Force and Furious Immolation.
If there are less than 8 mobs, Furious Immolation is the key. It gathers all the mobs, does good damage, and adds smolder 100%. The reason why this is so important is that when the mobs are gathered, all your other abilities do more damage. If the 8 mobs are all in one point, and you connect with your rotation, it is likely all but the large elites will be dead.
If there are ever much more enemies, Oppressive force is the way to go. It ticks 5 (or 6) times and has no target limit, adding a substantial stun, and does good damage. If you are like me and prefer to pull door to door, or are short-manning draco, or any other situation when you are swarmed with adds, OF is key. The drawback is it spreads mobs out, making it harder to hit them with your AOEs, but often this can be solved by kiting.
At Will:
Chilling Cloud – if everything else is on cooldown, throw in a full rotation of chilling cloud, add a chill stack, hit 5 mobs, gain the 15% damage from FPT, and go back to your rotation. Because of the FPT (frozen power transfer) feat it’s important to finish the rotation if possible.
25 – How we do damage -
Quantitatively, this can vary largely based upon the instance, the group composition, and other factors. But in general your damage is like this:
25-30% – smolder/rimfire smolder
10-20% – assailant
10% – conduit
10 % – Creeping frost + warped magics
8% – Shard
7% – oppressive force
7% – steal time
6% Icy Terrain
4% – Terror Weapon/Plaguefire Weapon
4% – Furious Immolation.
2-3% – Chilling Cloud.
This is very rough and highly variable, but in general this is where your DPS will come from. Notice that 50% of your damage is indirect, versus almost every other class who deals damage in a direct way.
25 – Playstyle.
The core of the MoF playstyle is DoT and kite – this means that when we engage a group, we are going to target the largest mob first, hopefully hitting him with conduit of ice. We then fight along the side of the group, expending our rotation as we move. How if there is a high priority target that poses a danger to us (archers are the key example), we must hit them with something – normally icy terrain is plenty). So by now, many of the small mobs are dead and only a few are left, so we just keep moving to the next group, and so on. The monsters we leave chasing us will tick away and sometimes die, whereas we expend our rotation on larger groups, making the use of those encounters more efficient. Since we are an AOE class, CW single target DPS is actually quite poor and so we want to fight as many mobs as we possibly can.
Now, if for some reason, you can’t kite to the next group, you want to get the mobs to run at you in a relatively straight line so you can hit all of them. For you math people, this means that if the enemies are in a pseudo elliptical group, the best positioning is at the apex of the major axis on the end where there is most aggro. If there are a large number of them, you can drop oppressive force and they will actually run into it. If there is a smaller amount, you can gather them with furious immolation and then hit them with everything you have.
26 – Awareness
It is actually extremely important to be aware of your team mates, their class/playstyle, their position, their abilities and the same goes with the enemies in the room. Hence when i am casting something i am constantly spinning my camera to see what is going on around me. If you see a teammate in trouble you can teleport over and freeze the monsters that are giving them a hard time, if you see a teammate cast FI or sing or unload an oppressive force against a wall, you can launch your rotation into their daily for maximum team damage. If your teammates are far too squishy and you have aggro, you can turn the monsters away from them so they can wail on the monsters, etc…
I don’t think there is a great way to explain this as much as instinct and experience. If you play with the same people over and over you will learn their play styles and adapt.
27 – Fighting Dragons
Dragons are special in Neverwinter now, and they have their own abilities. In general, they are more dangerous at the ends than the sides. The most dangerous part of a dragon is the tail, which can quickly swipe you and prone you. It is very difficult to see the animation, if there is even any animation.
The front end of the dragon is dangerous but less so, because you can see the animation of each attack. He can bite, play with you like a cat with his paw, or nose bump (which really hurts). However, this is not as dangerous as the tail, because it can’t prone you. Dragons also have a breath attack, with a many-hit knockback (very dangerous, especially if undergeared), or fireballs, which hurt and can have a prone, a AOE DOT, or both. Luckily these attacks are slow and easy to dodge.
The optimal place to fight is therefore under the wing, and weather at range (like Lostmauth) or close (like the dracolich), the best posistion is by the wing, slightly to the front. The reason why you want to be near the front is in case your teammate grabs aggro and turns him way to fast (a bad habit of TRs and GWFs), which can swing the tail at you quickly, prone you, and leave you vulnerable to many other attacks.
Dragons also have a wing flap, which will be two pumps and a flap, producing an AOE knockback, a second hit of falling damage, and can really mess up your rotation. If the flap is on a 3 count, you can dodge on a 2 count. Since you can dodge, you want to dodge into the dragon and continue your rotation like normal. This means you won’t be in a bad position, you won’t waste time running back to the fight, and you can keep the rhythm of your rotation.
In the dracolich fight, or similar fights where there a lot of adds (far more than 8), you want to fight on top of the boss and drop your oppressive force there. As you move from one side to the other, the trailing adds will move into your AOE control and start taking damage.
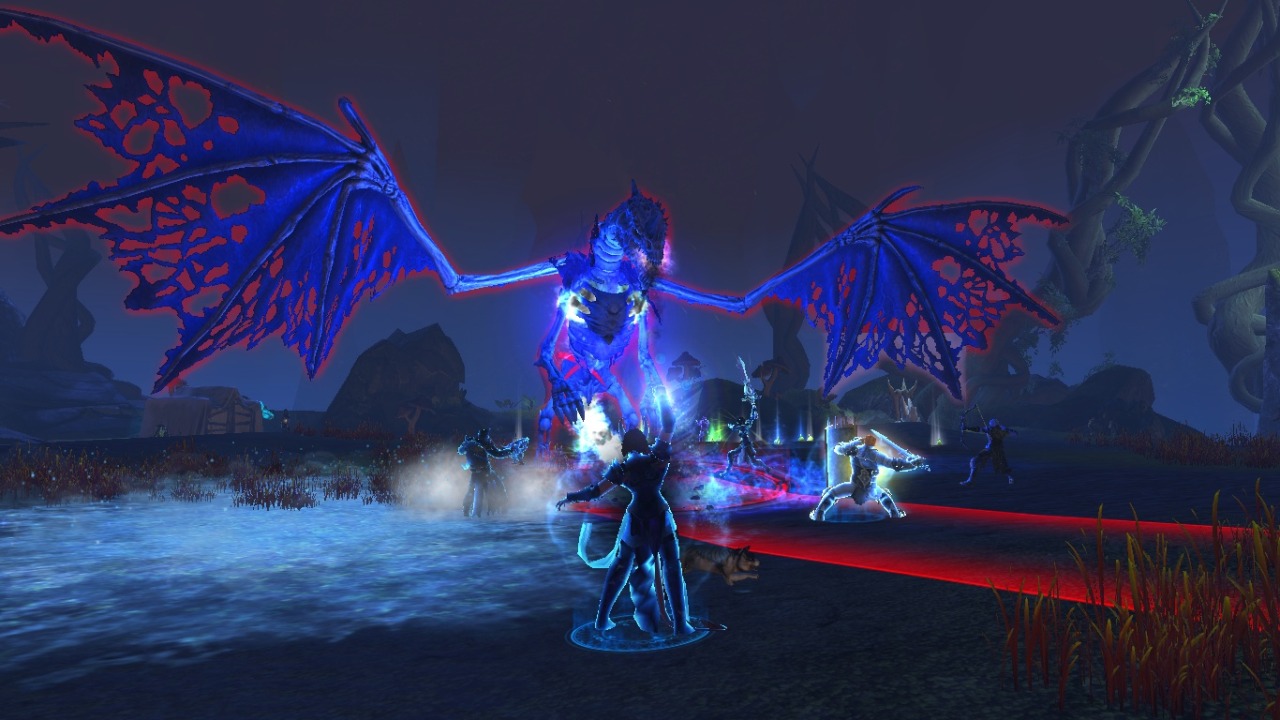
28 – Special Dangers
There are things we have to be aware of. In terms of damage, the innocuous archers have the ability to deal out a lot of damage to us because they have a high arp. Too many archers can eat your HP quickly.
A second source of damage is the whight’s lifesuck ability (either in a cone or circle), which ignores armor and ticks multiple times, sometimes even after you dodge. You need to get out ASAP.
Anything that can prone or stun us is especially dangerous. These include fireballs, hulk AOEs, witch’s black balls, dragon stuns, dragon wing flaps, spikes from above, the hellfire magus flame pillars from below, and others. You must always be cognascent of things that can stun you. Just like it is easy for our team to wail on stunned targets, it is also easy for their team to wail on you if you get stunned! If you avoid stuns and there is no lag, you should be able to survive almost anything, but any sort of chain stun will likely kill you.
29 – Individual Dungeons:
Cloak Tower:
The only thing dangerous in here are the eyes of Gurugmesh (I can’t spell it), that have AOE prones. The rest of the mobs are painfully easy.
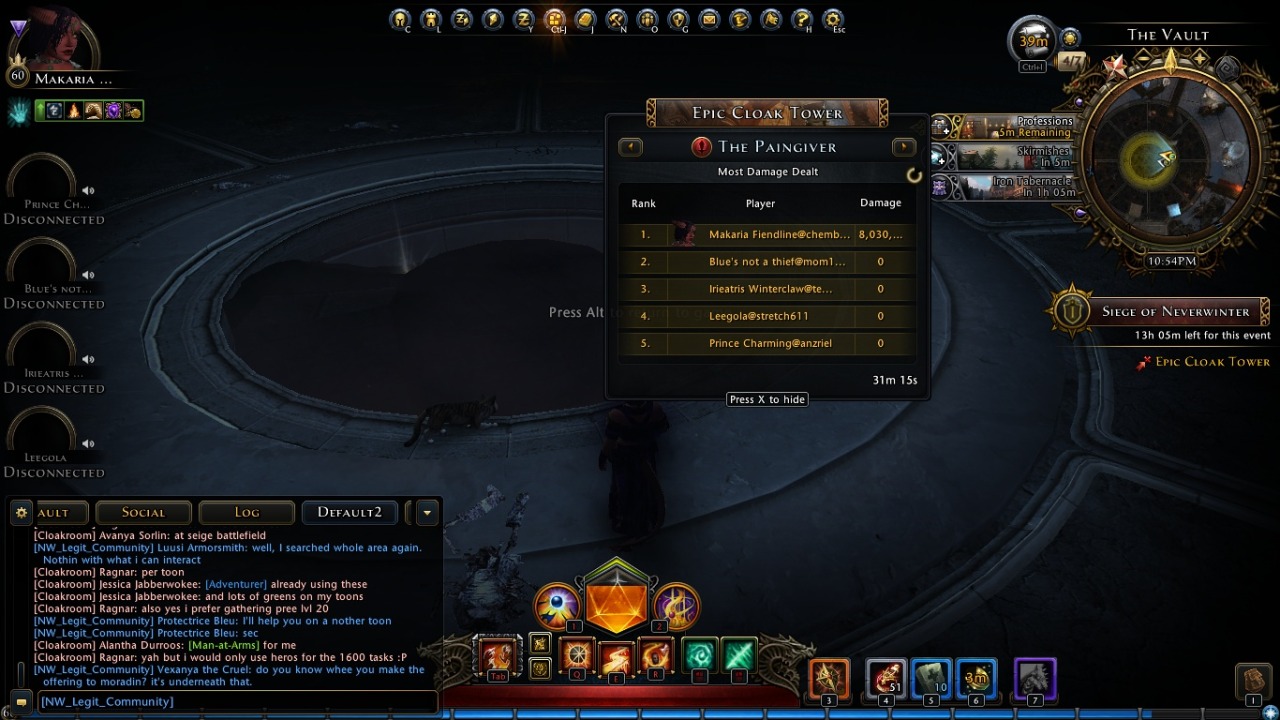
Throne of Idris:
A relatively easy dungeon, the real danger is Idris’s black stun balls. If you don’t get hit by them, you will be fine. The Direheims can hit pretty hard, but are slow and easy to dodge.
Lair of the Mad Dragon:
The hard part here are the Erinyes. They have an AOE heal, so your team must focus them down and kill them first, or else they will heal all that damage you already did. If you have a low team DPS, be sure to freeze/stun/prone them so they can’t use their heal.
Cragmire Crypts:
The danger here is Tavern Blackdagger himself. He can teleport and his swings actually hit very hard. In that fight, if you are kiting him around, be sure to hit the archers on your way.
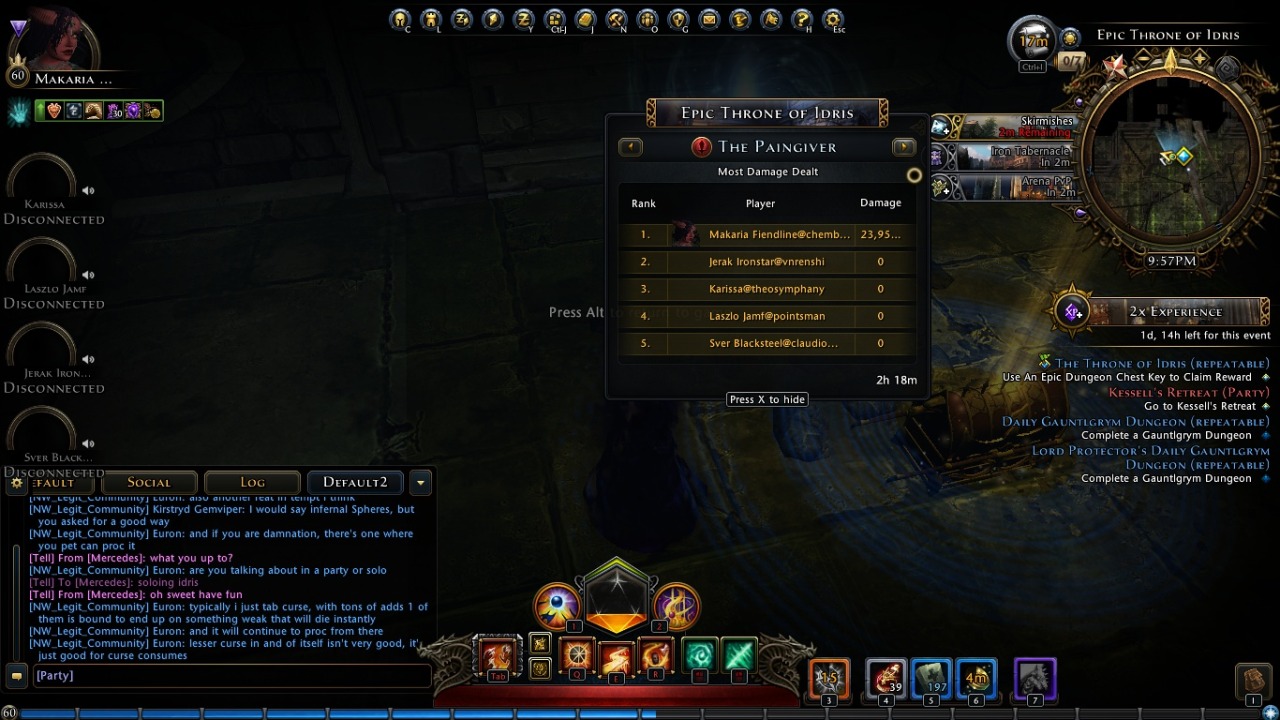
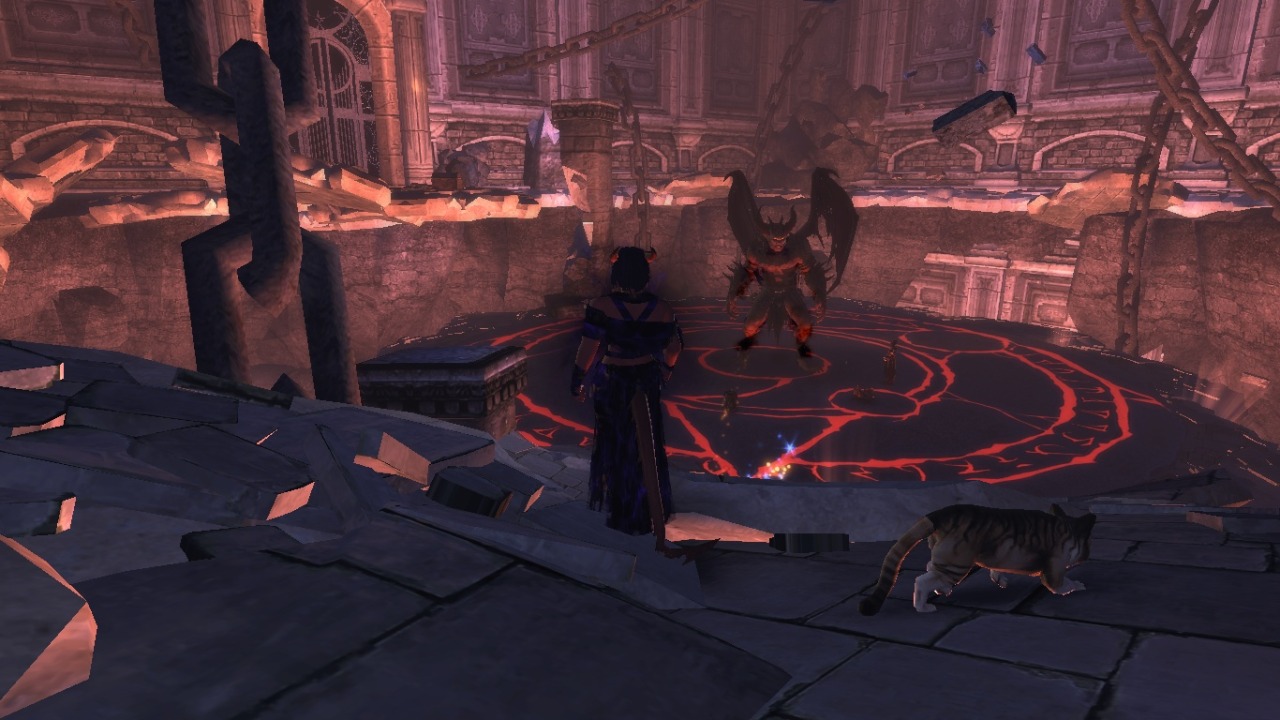
The Gray Wolf Den:
Some of the monsters in here have AOE charge attacks with a knockback to them. You must avoid those as you make your way through. I found the clear very easy.
This boss is a nightmare for CW. If you watch her closely, the slow attacks she has are easy to dodge, but she has some quick attacks that are difficult. Her charge has a much shorter timing than the charges from the normal monsters elsewhere, so you must dodge immediately. The worse part is she periodically spawns shadow wolves that can one or two shot you – they are very painful.
So you have to get out of there quick and slam icy terrian. If the wolves aggro on you, you might not have casting time for OF or steal time. Personally, this fight i dropped shard for fanning the flame to increase DPS on the boss. Ray of Enfeeblement is also a great option here.
Incredibly difficult to solo, but if you have some space to pew pew you should be able to get some good DPS on her.
The Frozen Heart:
The issue in Frozen Heart are the golems – which you cannot control. They have a smash attack, which causes a brief prone, and an AOE chill attack, which freezes you. The wolves also have a freeze that does tons of damage, and like always, if the archers wail on you you’d be in trouble. I would be sure to dodge the AOEs first, drop IT on the archers second, and launch my rotation as i kite.
The clear wasn’t so much hard as it was long, the golems have a lot of HP and you have to fight the first boss 3 times. With a full team, it goes much much faster.
Hrimnir’s attack do tons of damage and can freeze and knock you back, so you must dodge them. Luckily, all his attacks are slow so if you watch your feet you shouldn’t have an issue.
In a full team, if you aren’t geared the idea situation is to have someone kite (i’ve done it on GWF, GF, CW, DC). If the kiter doesn’t have the regen/lifesteal/potions/etc to take the arrow shots, you can have someone take out the archers. A HR seems idea here, but a CW can make due to.
The rest of the team can attack the boss. His attacks do hurt but he is painfully slow. The spikes from the ground appear with plenty of time, his axe takes forever, and he throws an iceball with a charge.
Hrimnir has a good amount of life, so keep fighting and he will go down. A great way to burn him is a TR stacking wicked reminder.

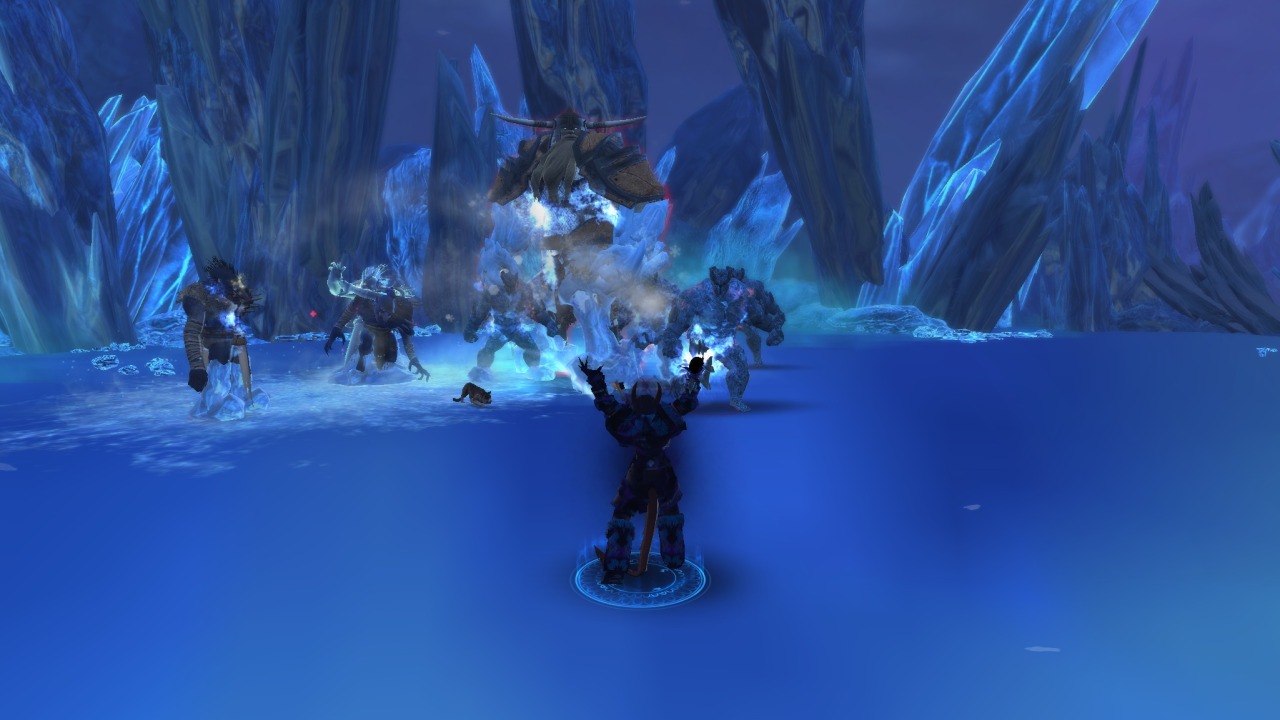

The Lair of the Pirate King:
Very much like the wolf den, there are monsters with AOE charge attacks you must dodge, else get knocked back. That’s really the only challenge, as the rest of the encounters are things you have seen before.
The boss acts like a whight with a lifesuck attack, so you must stay out of his AOE.
In all honesty, this dungeon is a faceroll. Cragmire Crypts is harder. My response when i was soloing was “is this even epic”
Note: Blue followed behind me to get chests and enchants. She didn’t help me fight along the way.
Spellplague Caverns:
The clear itself isn’t bad, but you have a lot of AOEs to dodge, as most of them come with a stun or a knockback. If you have fleet footwork though, the monsters themselves are slow and predictable. If your team is struggling, slow down.
The amount of stuns in this dungeon is really the problem. If you have issues, just slow down and pull less. If you run out of stamina and you get chain stunned, you’re dead.
The last fight really isn’t so bad, but you do have to stay out of their AOEs. You can’t control the adds so they will be clouding up your screen. Personally i tilt my camera way up and watch my feet. Remember that the floor falls as you fight and you will be fine.
Temple of the Spider:
Monsters here hit hard, but luckily there aren’t many prones, stuns or knockbacks, though some webs can root you. I mostly just kite to the dirders and blow everything up on them.
The challenge in this dungeon is the web attack. You won’t be able to move or dodge well, leaving you vulnerable to painful things like blademasters and driders, so watch you feet. Also, unlike almost every other control effect soulforge does NOT free you from web, so chain death is a serious risk. If you pull smaller, the clear isn’t that bad.
Syndyrth can heal herself, so you can drop your daily when that happens to prevent the heal. If you surround her, she will not port and it will make the fight much easier.
Note: Syndyrth seems impossible for me to solo, as i don’t have the single target DPS to out damage her heals. She is actually pretty easy in a group, however. I heard that a Fury SW can solo her with TT – but remember SW have really great single target DPS, and CW DPS is almost all AOE.
Caverns of Karrundax:
This dungeon has been nerfed so much, but in general it just long with a lot of fire attacks. There are (no longer) many prones or knockbacks, but the mobs here can be hard to control and can really hurt you. That said, if you take it one encounter at a time, the clear is easy.
Pyraphenia is actually more difficult than Karrundax. If you get past the first boss, the other two are relatively easy. There is, however, a lot of red on the ground, so it’s important to watch you feet.
Now, there are many encounters you can sneak by. I learned the hard way while soloing that THESE ENCOUNTERS ARE MUCH MORE DIFFICULT THAN THE BOSSES. Forgecallers, especially in multiples, are very dangerous and take a long time to kill. There was once I was fighting two forgecallers and then got ambushed by two magma brutes. I died and I don’t know where those brutes went. This is why groups sneak around these encounters. (Also might be why cryptic hasn’t forced you to kill them).
The dragon is also relatively easy as he is predictable and doesn’t have much HP. The danger is the hurlers (their version of archers), so kite around and catch them if they are giving you an issue. She was actually surprisingly easy. You can kite the adds, catch the kobolds with steal time and icy terrain, the wyrmlings are painfully slow and easy to dodge. The danger is karrundax’s fireball, which is indicated by the GIANT RED CIRCLE ON THE GROUND.
Overall, surprisingly easy T2. Not bad at all.
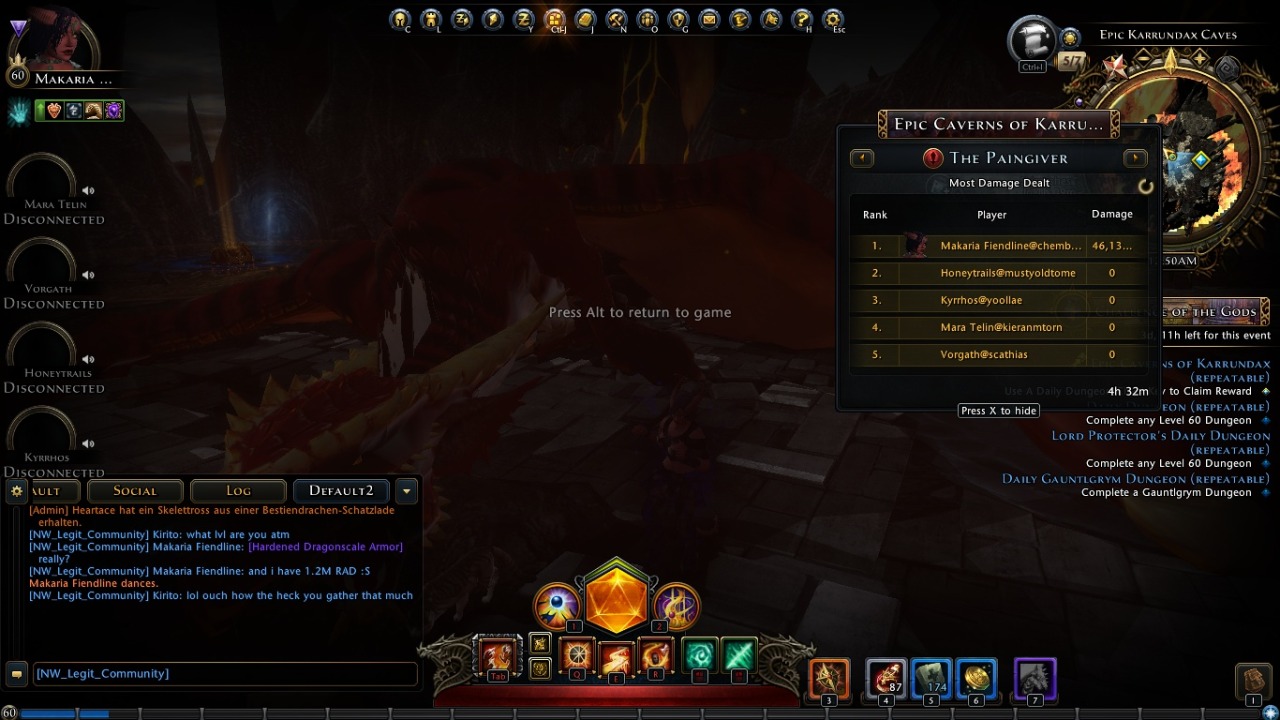
The Dread Vault:
The clear is very long with lots of stuns from mindflayers and a suck and prone from the thoons. These are very dangerous, so if you have any issues, slow down and pull one by one.
The last boss is a real pain, but in epic you can go to the back corner and take the adds little by little. Once the adds are clear you can hit the boss, but expect a very long fight.
At ⅔ and ⅓ health, he will spawn a boss from another dungeon (not kidding), with all of his adds that can freeze and stun you (also not kidding).
I soloed normal dread vault once and I beat epic dread vault once per class, and that’s it. I really dread this place.
Castle Never:
An ideal dungeon for us, as it is basically a giant AOE fest. In section one, the clear is easy except for the hallway of death (prone to lag spikes) and the spitters just before the spider. The spider himself isn’t difficult.
In second two, we now have some red wizards and archers, which are obnoxious, but if we can hit the archers early, then stay out of the red, we should be fine.
The beholder has some big AOE stuns that are very long. Getting hit can sometimes mean death, but luckily his HP is low and he melts very quickly. The skullcleavers that spawn hit hard, but are easily killed and controlled.
In section 3, the clear to the shadowfell is easy. In the shadowfell, the pulls after the traps must be taken one by one as the monsters can really hurt and the witches can stun you. However, if you don’t overpull, you should be fine.
Xivros is relatively easy, as his attacks are slow and predictable. The issue is the wights and his AOE personal lifesuck, which is extremely painful. If you stay out of that the fight shouldn’t be back.
Second four clear is more of the same – wizards, archers, wights, skeletons, zombies, and one cube. Personally i like to pull everything and blow it up
The dracolich is just a dragon with a ton of adds, and adds you’ve already faced. Follow the dragon strategy above. However, there are hands that erupt from the ground you must dodge. You can also dodge them on a 2 count, so if there is no lag, you can get into a rhythm and timing and it’s easy
Malbog’s Castle:
A long clear with some difficult mobs that really hit hard, it’s more of the same. By the time you get here and you’ve done the other dungeons, it should be nothing to bad for you to handle. If you are a relatively new player, do something else first.
Fulminorax has some dangerous AOEs to dodge, but that’s not the real danger. Periodically Valindra will port down and either choke a teammate or summon a portal that produces whights. If she comes down the team must target switch and nuke her before she can accomplishh her goal. If you fail, either your teammate will die or you will get a portal which constantly spawns wights, which can eventually overwhelm you.
At ⅓ and ⅔ hp, Fulminorax will fly and spray lightning at you. It really hurts, so walk to a clear area and make sure you don’t get hit.
Valindra’s Tower:
The clear is a very basic, and imo, obnoxious AOE fest.
Valindra herself isn’t very bad, but in phase two she will occasionally grab a teammate with a phantom hand, which you must kill to set them free. If the caskets spawn, each team member has an area to stop them from spawning. If you fail they produce dangerous whights.
At ⅓ and ⅔ health, There will be an intermission with ghosts and lightning. This hurts a TON (one shots most people), and hence you must stay out of it. If the team goes in the same direction, it is pretty easy.
In the last phase she will spawn a ton of caskets. You can either try to close one round and then burn her or just burn her from the beginning. Either way, you must have the DPS to take her out before you are overwhelmed
Epic Shores of Turen:
The clear itself is inelegant, but the monsters here can easily one-shot most CWs, so mustn’t overpull and be careful.
The boss fight is obnoxious, he has 3 attacks. A fireball (slow and easy to dodge), a firebreath (slow and easy to dodge) and dancing flames (quick and hard to dodge). Hopefully you have a tank drawing his aggro so you don’t have to dodge the dancing flames, but if you don’t you should just study his animation carefully until you get his animation down – but i am warning you, it’s quite difficult.
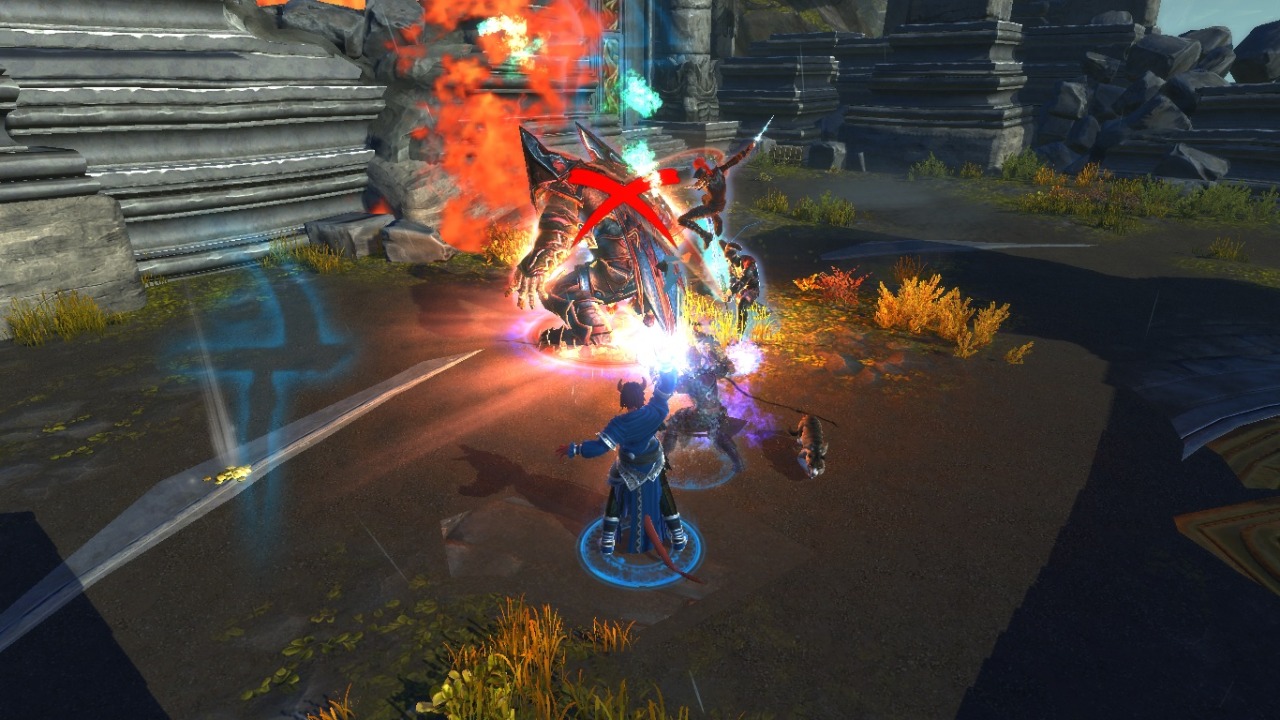
Epic Lair of Lostmauth:
The clear is pretty straight forward, but the mobs hit extremely hard and can kill you quickly.
The first boss fight is single (or dual) target, so just stay back and try to do as much DPS as possible.
The second boss fight is two scorpions, which typically one person kites one away while the team kills the other, then wails on the remainder. Their attacks are slow and easy to dodge, but the real threat is fire from the sky, which is easy to miss.
Lostmauth himself is easier than the scorpions, IMO. It is a single target fight, so follow the dragon strategy and stay at distance. Watch your feet for the spikes and the air for the fireballs and his AOE, but you have the space to dodge. At the intermission, take a corner and step into the middle if there is an AOE under you. Finally he will die, which doesn’t take too long, and if you are lucky you will pull a belt.
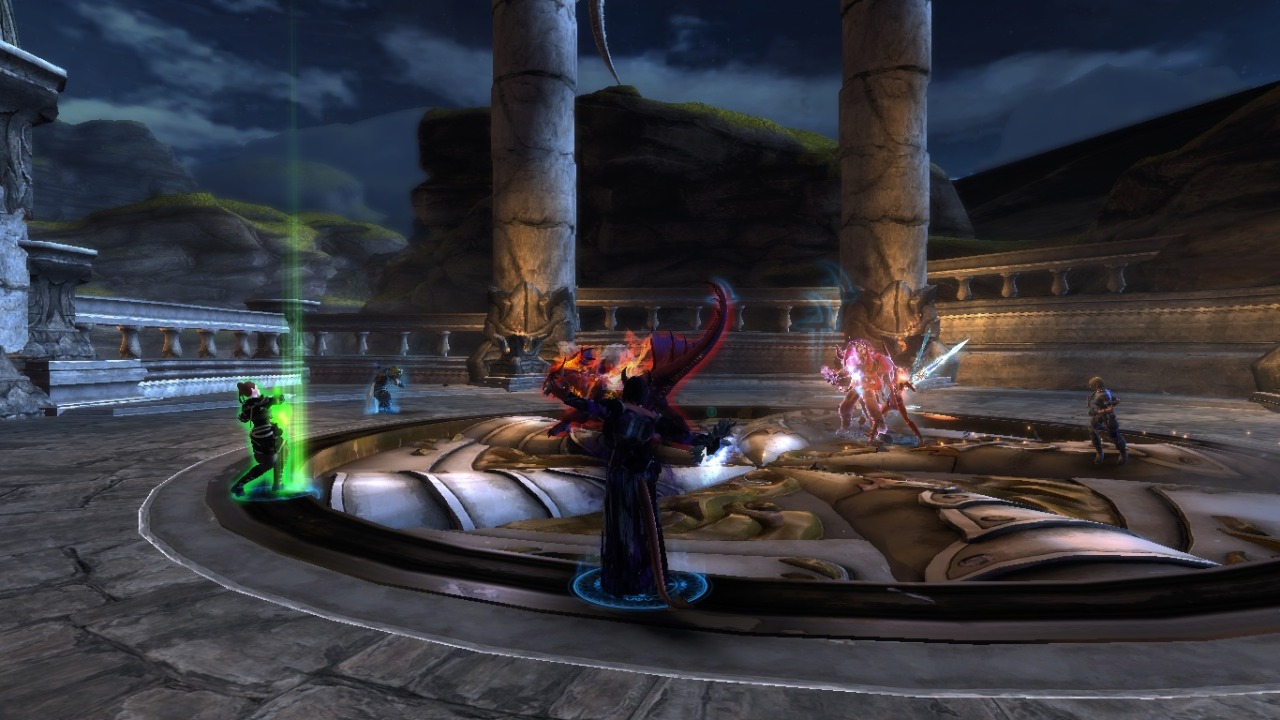
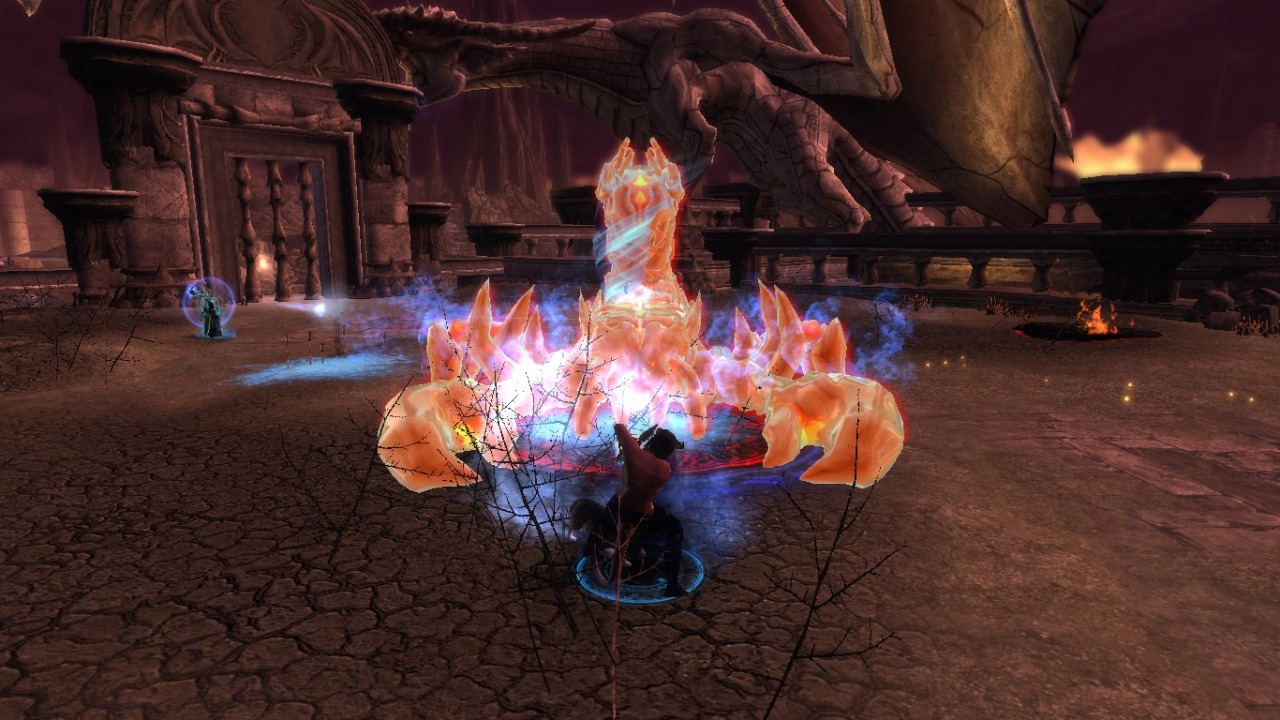
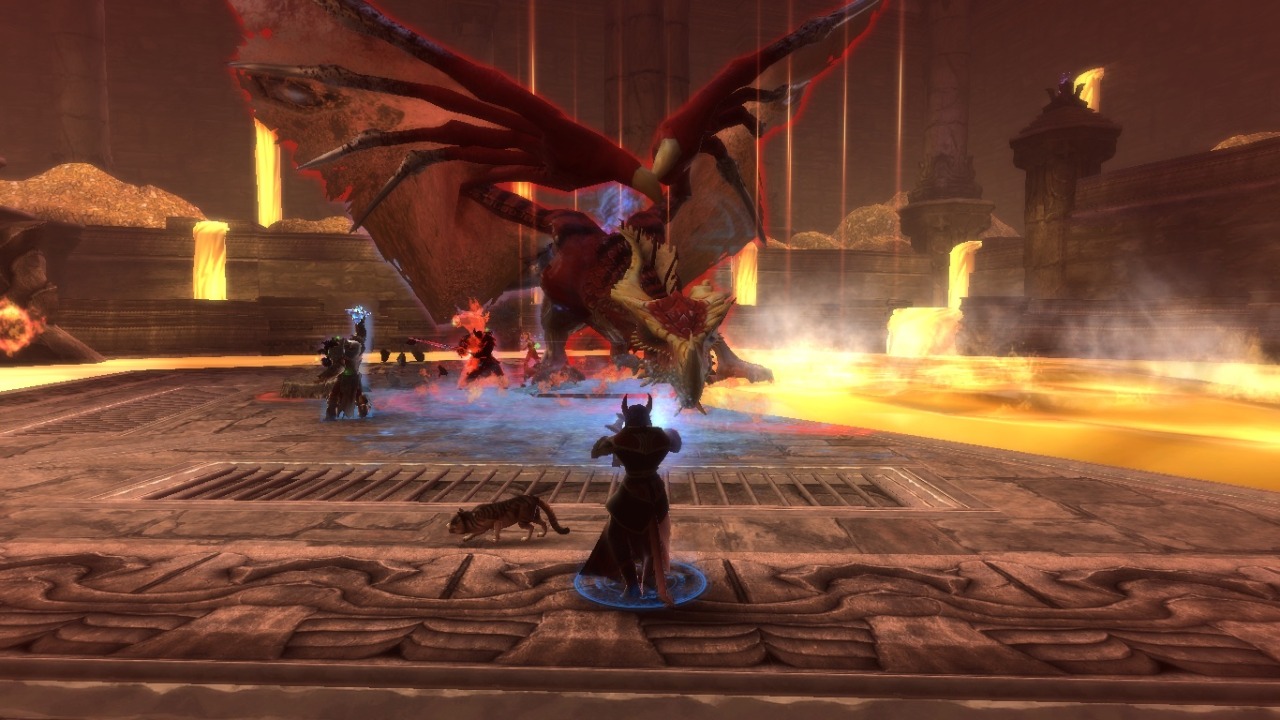
30 – Wrapup
A Few things:
I don’t care about gear score and neither should you! The only thing that matters is team effectiveness, so there are ways to increase your GS, yet get worse and also decrease your gear score and get better. Always do what makes you play best and not what inflates your GS!
I don’t care about paingiver and neither should you! There are so many errors in how this is calculated, particularly with smolder and tyrannical threat, making the SW look like she is doing more damage than she is and the MoF look like she is doing less damage than she is.
Secondly paingiver does not count buff, debuff, control, teamwork, etc, all of which are extremely important.
Therefore the paingiver charts are so crude they are essentially meaningless. I would do my best to ignore them.
I just want to say, thank everyone for reading. Hopefully this was helpful. Feel free to leave note and constructive comments. Flaming or trolling will be met with heads, spikes and walls. Thank you, until next time.
Resource http://mmominds.com/2014/11/03/chems-comprehensive-mof-guide-pve-mod4/
No comments:
Post a Comment